Idler Arm Replacement Procedure
Posted: Tue Mar 03, 2009 11:22 pm
Idler Arms can and will eventually fail. Mine just went around 115K miles. You'll notice they're bad by grabbing a front wheel with one hand on each side when the vehicle is jacked up and noting excessive play as you push and pull. Anyway, mine just failed state inspection, so now here's how they're changed.
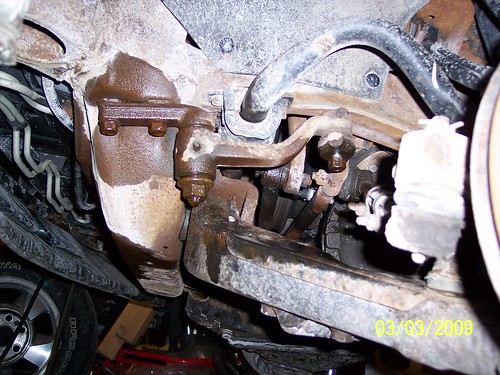
1. Jack the front of the van and remove the front wheels for ease of working. Now here is the idler arm--note that I sprayed it with some PB Blaster to make the bolts easier to remove--something like that or WD40 would not be a bad idea at this point:
2. Remove the two bolts closest to the front bumper. On the 2003 model, these are 18 mm bolts. Here it is with them out:

3. Remove the prevailing torque nut from the idler arm ball stud, shown below. Note, on 2003 model, this is an 18 mm bolt. Also, if it's been replaced it may have a carter pin in it--obviously, if it does pull that first
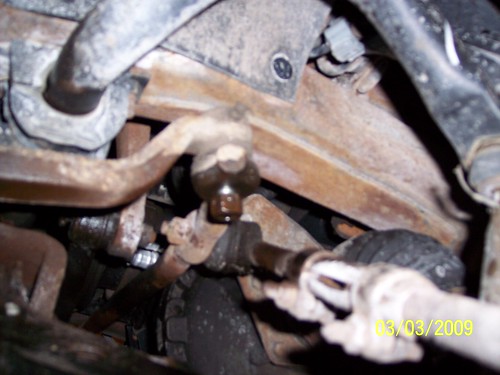
4. Now use a tie rod separator to remove the relay rod from the idler arm. Note, while shopping for tools I found out they make tie rod separators for air hammers--COOL! But it may actually be just as easy with the standard long hand held tool... EDIT--READ THIS: I heard that if you do what I did you could damage stuff--apparantly I got luck. They make a special tool for this, and for $20, just get it. Here's what I'm talking about: http://www.jcwhitney.com/LISLE-TIE-ROD- ... _10101.jcw The photo below worked for me but you could damage your tie rods:
5. Tighten the nut in the center of the new idler arm to 40 ft/lbs--I did this in my vice prior to installation...
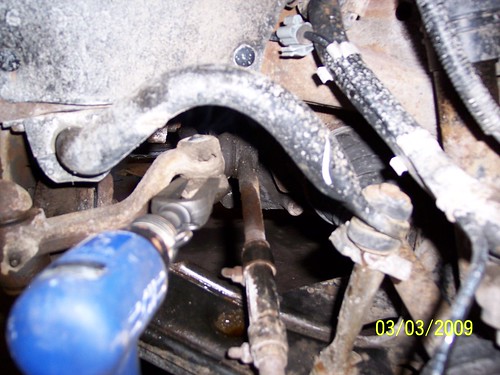
6. Install the new idler arm. Note: I found that a deep well socket on a breaker bar works great to seat the ball stud, when applied from underneath and lifted up. Here it is before seating that and tightening the bolts:

Torque settings:
* The two bolts closest to the front bumper should be tightened to about 105 ft/lbs
* The bolt in the center of the idler arm should be tightened to 40 ft/lbs
* The prevailing torque nut should be tightened to 35 ft/lbs.
Notes:
* Remember to install the grease fitting(s) if not already on the part
* Remember to grease all grease fittings when done
* I am only providing this procedure to tell you how I did this. In no way am I telling anyone to do this, especially if they're not comfortable with this repair. Also note, I'm a chemist not a lisenced mechanic, so as with all things, consider the source.
I would like some more experience folks to comment on what this does to the front end alignment and to double check my torque settings...
1. Jack the front of the van and remove the front wheels for ease of working. Now here is the idler arm--note that I sprayed it with some PB Blaster to make the bolts easier to remove--something like that or WD40 would not be a bad idea at this point:
2. Remove the two bolts closest to the front bumper. On the 2003 model, these are 18 mm bolts. Here it is with them out:
3. Remove the prevailing torque nut from the idler arm ball stud, shown below. Note, on 2003 model, this is an 18 mm bolt. Also, if it's been replaced it may have a carter pin in it--obviously, if it does pull that first
4. Now use a tie rod separator to remove the relay rod from the idler arm. Note, while shopping for tools I found out they make tie rod separators for air hammers--COOL! But it may actually be just as easy with the standard long hand held tool... EDIT--READ THIS: I heard that if you do what I did you could damage stuff--apparantly I got luck. They make a special tool for this, and for $20, just get it. Here's what I'm talking about: http://www.jcwhitney.com/LISLE-TIE-ROD- ... _10101.jcw The photo below worked for me but you could damage your tie rods:
5. Tighten the nut in the center of the new idler arm to 40 ft/lbs--I did this in my vice prior to installation...
6. Install the new idler arm. Note: I found that a deep well socket on a breaker bar works great to seat the ball stud, when applied from underneath and lifted up. Here it is before seating that and tightening the bolts:
Torque settings:
* The two bolts closest to the front bumper should be tightened to about 105 ft/lbs
* The bolt in the center of the idler arm should be tightened to 40 ft/lbs
* The prevailing torque nut should be tightened to 35 ft/lbs.
Notes:
* Remember to install the grease fitting(s) if not already on the part
* Remember to grease all grease fittings when done
* I am only providing this procedure to tell you how I did this. In no way am I telling anyone to do this, especially if they're not comfortable with this repair. Also note, I'm a chemist not a lisenced mechanic, so as with all things, consider the source.
I would like some more experience folks to comment on what this does to the front end alignment and to double check my torque settings...