Page 1 of 2
Installation of a Taurus 2-speed electric cooling fan.
Posted: Tue Nov 08, 2011 4:40 pm
by LiftedAWDAstro
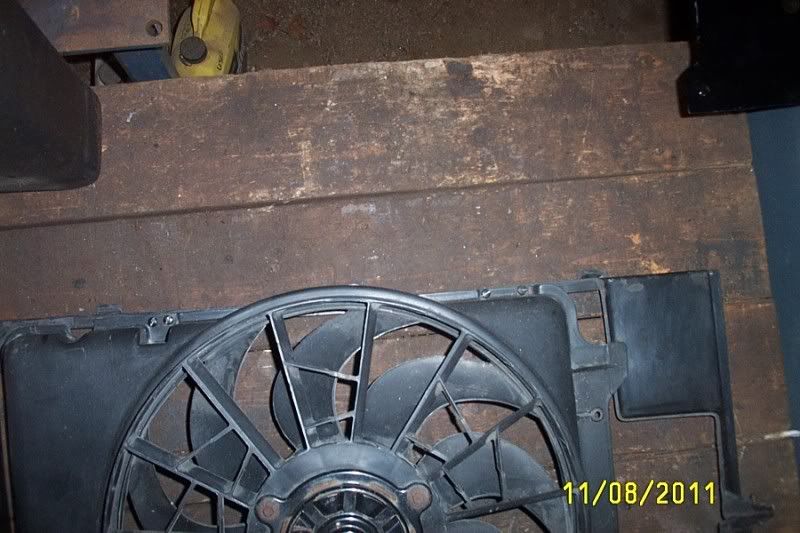
I decided to go to a Ford Taurus 2 speed electric cooling fan to replace the stock clutch fan. The reason for doing this is to help with warm-up in the Fall and Winter and possibly gain a little mileage. The fan needed is from a 3.8L V6 equipped Taurus or Sable from the early 90's. I also bought a Hayden 3654 2-speed controller. It is adjustable from 160 to 210 degrees and is rated for 50 amps. The Taurus fans draw upwards of 70 amps on high (startup) so I ordered a 70 amp relay.
Costs:
Fan - $40 from Ebay
70A relay - $16 from
The 12 Volt Guy
Hayden 2 speed controller - $42.20 from
Auto Parts Express DO NOT BUY FROM THESE GUYS!
Low speed cutout relay - $9.30 from NAPA part number MPE AR272SB
Second fan controller: TorqFlo part #733647, $34.99 from AutoZone (bought due to failure of the Hayden controller and poor warranty from Auto Parts Express)
Second fan controller failed as well after 9 months and no warranty from Auto zone! (went back to stock clutch fan setup.
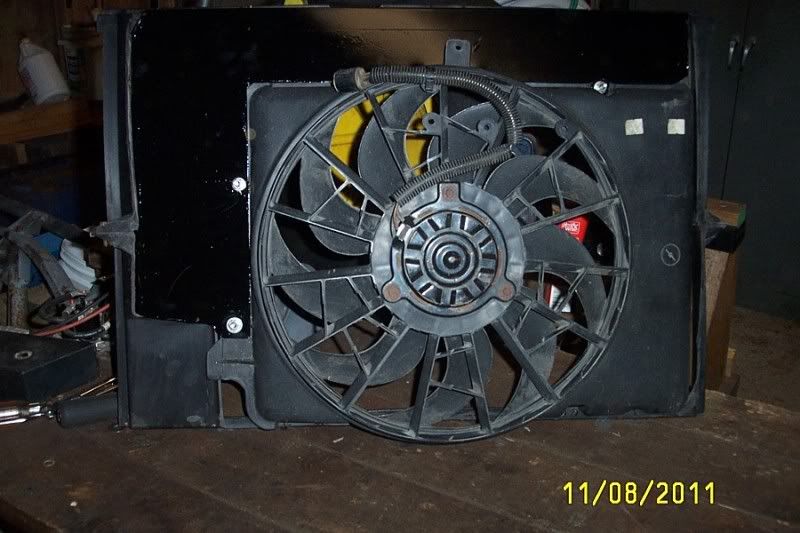
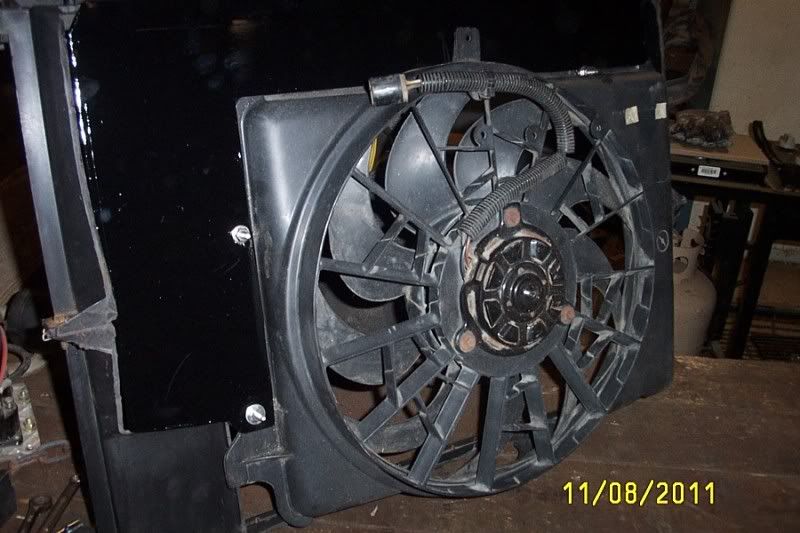
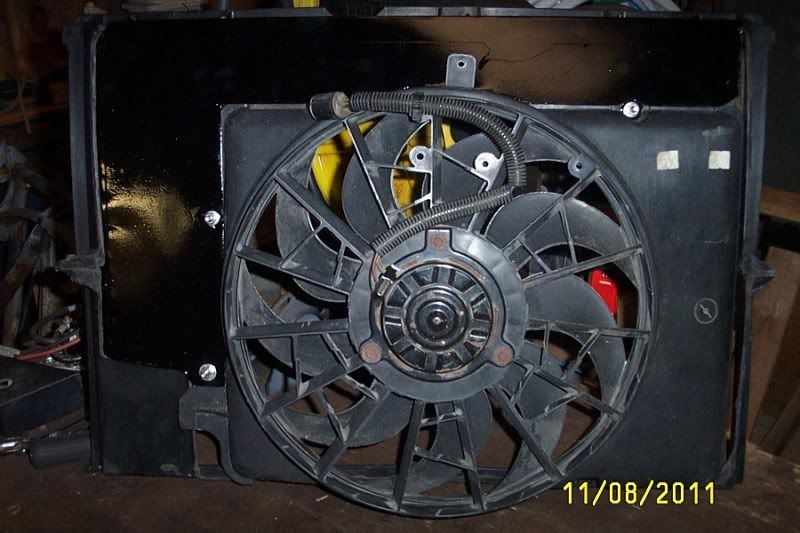
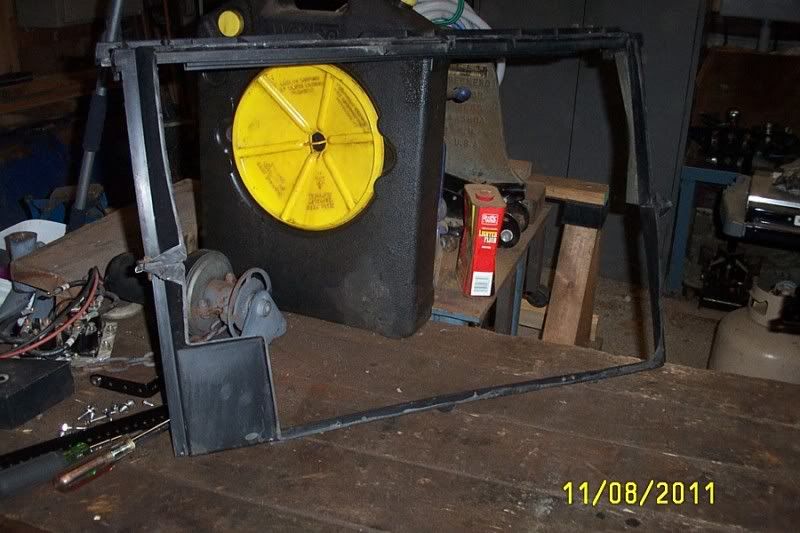
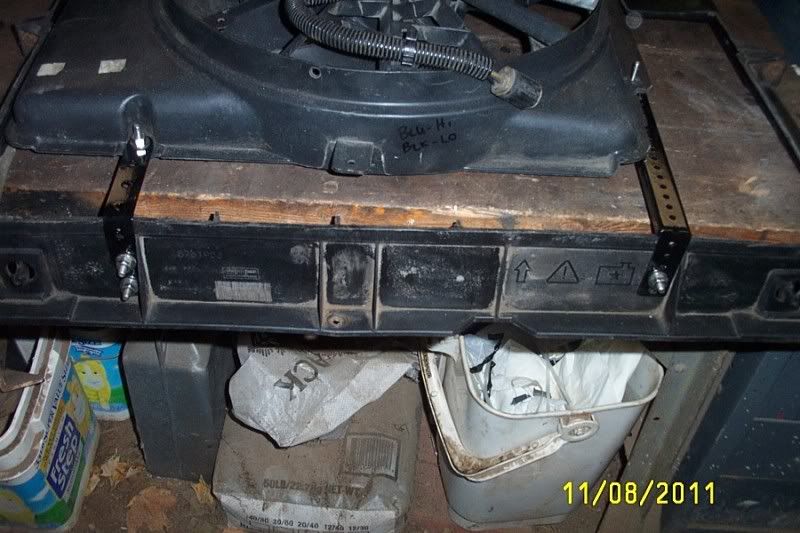
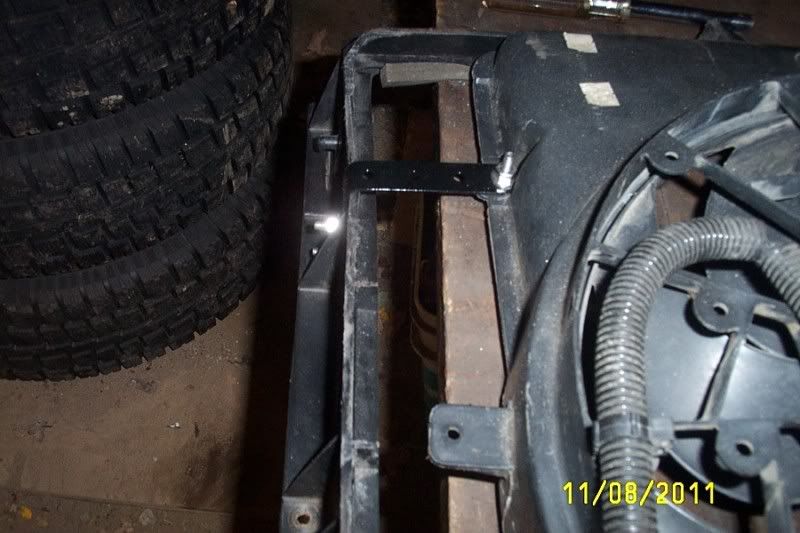
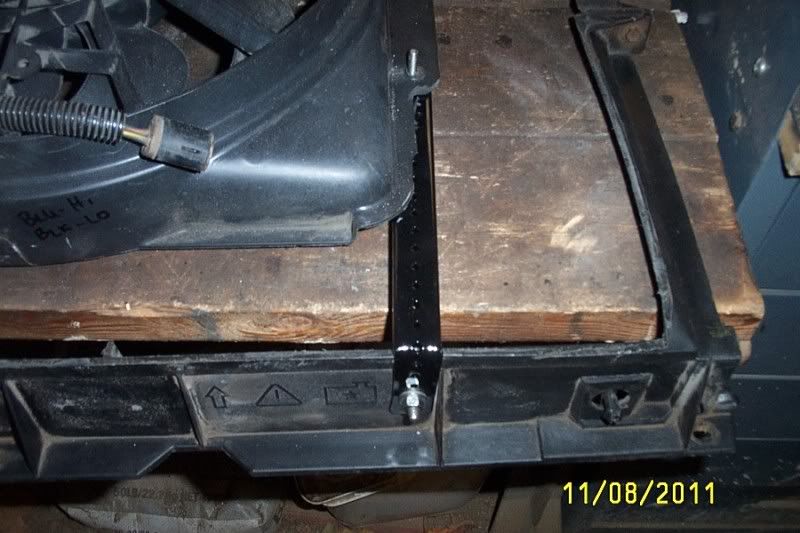
Started by removing the stock shroud and clutch fan. I then put the shroud together and cut it out leaving basically a frame.
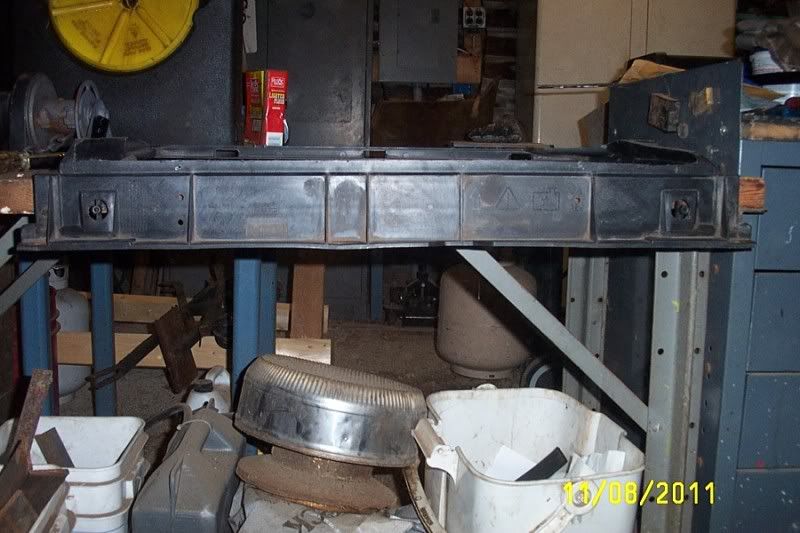
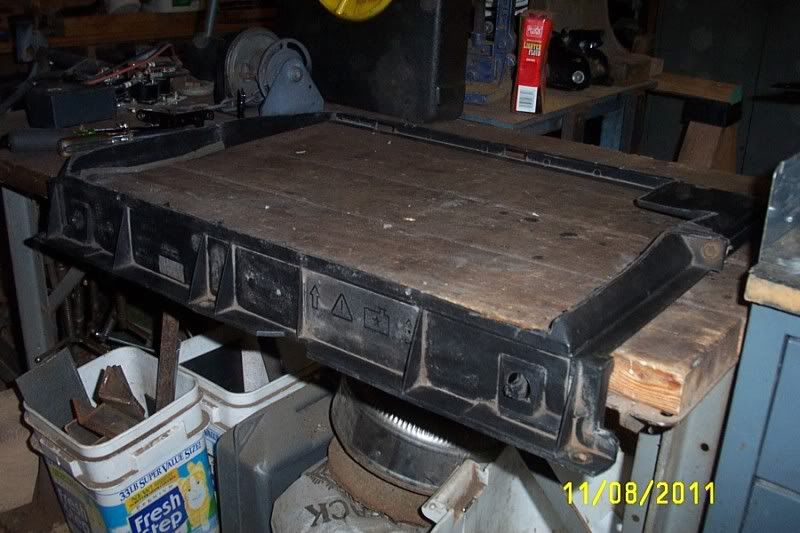
I then placed the fan over to get a good fit and made a couple brackets. The bottom is bolted with 4 - #10 x 1/2" screws. I'll let the pics work...
Re: Installation of a Taurus electric cooling fan.
Posted: Tue Nov 08, 2011 4:43 pm
by LiftedAWDAstro
Re: Installation of a Taurus electric cooling fan.
Posted: Tue Nov 08, 2011 4:46 pm
by Smiliesafari
Nice job, Dean. I was going to ask why you did that when the stock fan works fine. Now I know. It's an up north thing. With that kind of amperage draw, do you think you'll need a bigger alt.
Re: Installation of a Taurus 2-speed electric cooling fan.
Posted: Tue Nov 08, 2011 4:58 pm
by LiftedAWDAstro
I doubt it as the SPB ran the same fan and it cooled perfect on low speed only. We'll measure and report the amperage draws with different loads. I will be doing the "big 3" upgrade soon too.
****Not sure if this will work or not****Trying to see if my fuel mileage spreadsheet shows up...
Mileage spreadsheet
Re: Installation of a Taurus 2-speed electric cooling fan.
Posted: Tue Nov 08, 2011 6:19 pm
by Cobra
263 gallons? spreadsheet came up for me
again you've done a rather neat job modding

Re: Installation of a Taurus 2-speed electric cooling fan.
Posted: Tue Nov 08, 2011 6:28 pm
by mdmead
Nice documentation on this. This is mod I'll be doing when... (if?)... I get my 5.3L put in.
Re: Installation of a Taurus 2-speed electric cooling fan.
Posted: Tue Nov 08, 2011 7:26 pm
by Cobra
same here as soon as i get my 6.0

Re: Installation of a Taurus 2-speed electric cooling fan.
Posted: Wed Nov 09, 2011 4:00 am
by LiftedAWDAstro
Thanks guys. Look at the sheet for the Nitro or my truck! We've put almost 2500 gallons in the Nitro and 3500 gallons in the truck so far!

Re: Installation of a Taurus 2-speed electric cooling fan.
Posted: Wed Nov 09, 2011 12:26 pm
by doyoulikeithere
Nice Mod Lifted!
I am curious why, when there is plenty of room to set the fan completely over the rad core, why you have it hanging down under an inch or two.
Is there a clearance issue?
Re: Installation of a Taurus 2-speed electric cooling fan.
Posted: Wed Nov 09, 2011 4:12 pm
by LiftedAWDAstro
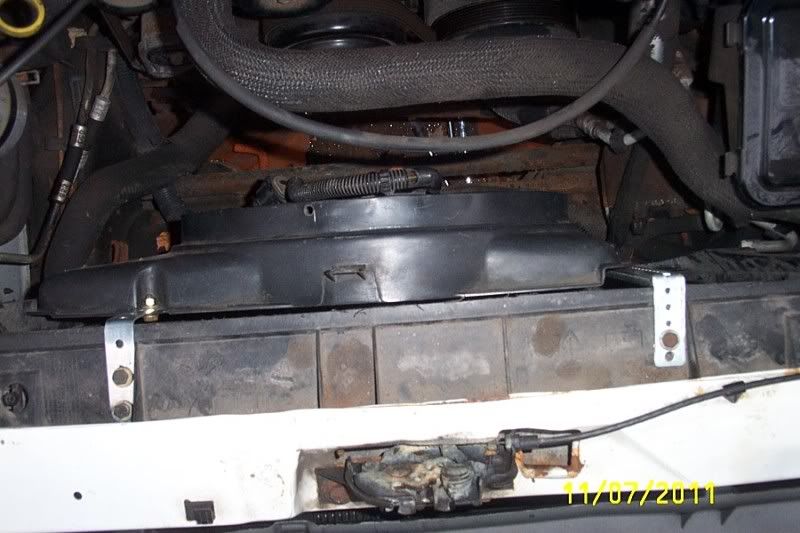
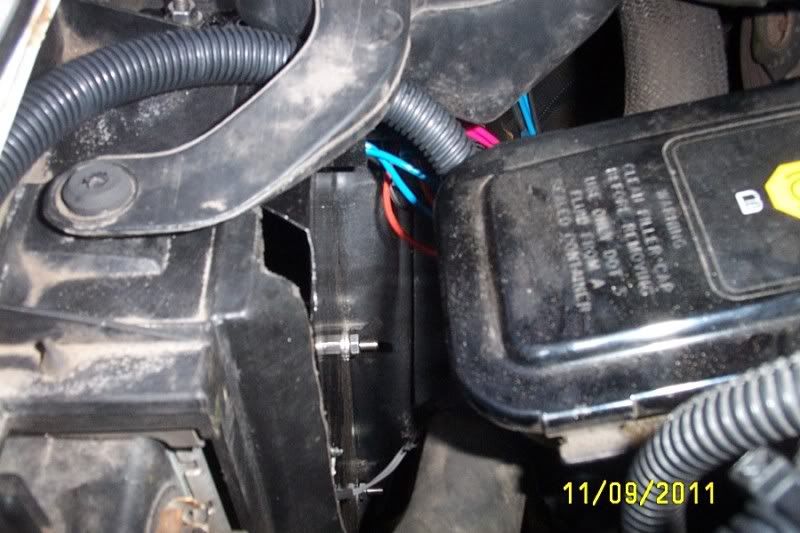
It is not hanging down under the core. It is actually in the bottom right corner.
Got it finished up today. The 2 speed control doesn't work the way it needs to. Not sure if it is messed up or is working correctly but not correct for my application. I currently have just low speed wired in and on a city drive tonight is cools fine.
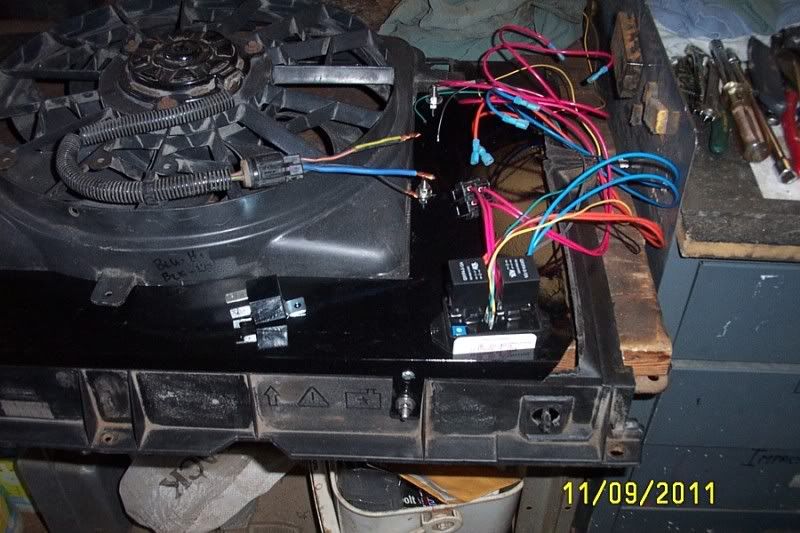
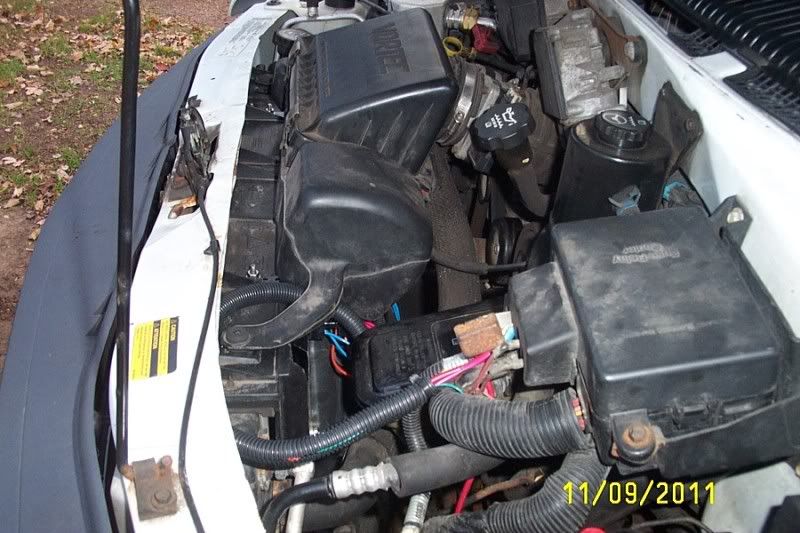
Followed the wiring diagram that came with the controller. I accessed the A/C and ignition on circuits inside the under hood fuse block. The block comes apart revealing all the wiring on the under side. I forgot to take a pic of that...oops.
The problem with the high speed operation is that this controller keeps the low speed relay on at the same time the high speed relay is on. With the Taurus fan, you must kill the low speed in order to run high speed. I can fix this with another relay to isolate the low speed circuit when high kicks on.
Re: Installation of a Taurus 2-speed electric cooling fan.
Posted: Thu Nov 10, 2011 12:25 pm
by doyoulikeithere
LiftedAWDAstro wrote:It is not hanging down under the core. It is actually in the bottom right corner.
Really? must a photgraphic illusion then.
In your Pix, It looks like the bottom center of the fan 'Circle' is below the bottom of the fan shroud/frame.
In fact in a couple pix, I can see the bottom of that frame, thru the fan's circle, at the bottom.
Oh well.....
Re: Installation of a Taurus 2-speed electric cooling fan.
Posted: Thu Nov 10, 2011 1:58 pm
by astroturf
I agree...
Any reason that you didn't center it up?
Just Askin, Jim
Re: Installation of a Taurus 2-speed electric cooling fan.
Posted: Fri Nov 11, 2011 10:21 am
by LiftedAWDAstro
doyoulikeithere wrote:
In your Pix, It looks like the bottom center of the fan 'Circle' is below the bottom of the fan shroud/frame.
In fact in a couple pix, I can see the bottom of that frame, thru the fan's circle, at the bottom.
I see what you are saying and yes you are correct but it only hangs below 1/2" - 3/4".
astroturf wrote:Any reason that you didn't center it up?
The reason is I wanted to mount it where it fit so I wouldn't have to make several filler pieces. If I had made a new shroud like I had on the SPB, it would be more centered. I just didn't have any thin aluminum at home to make a completely new shroud.
Filled up yesterday and have put on 70 - 80 miles since and it seems to be doing a little better. Worked last night and it was snowing this morning (around 35 degrees). The van definitely warmed up much faster and was actually shifted in OD with TCC locked sooner than with the stock fan. Low speed is keeping the engine temp right where the needle was before. It sits between 1 and 2 lines down from the 210 mark. With the defroster on this morning, the cooling fan wasn't on when I got home. Just like I figured.
I did stop by NAPA yesterday and got a relay with both normally open and a normally closed contact. I will use this to disable the low speed when high kicks in. There are also an extra set of low and high speed wires for a second fan. I may wire these with LED's to monitor what speed the fan is on right on the dash.
Re: Installation of a Taurus 2-speed electric cooling fan.
Posted: Fri Nov 11, 2011 4:18 pm
by doyoulikeithere
Excellent Mod!
I like it, might just do it as well.
Thank You Sir!
Re: Installation of a Taurus 2-speed electric cooling fan.
Posted: Sun Nov 13, 2011 11:29 am
by LiftedAWDAstro
LiftedAWDAstro wrote:The problem with the high speed operation is that this controller keeps the low speed relay on at the same time the high speed relay is on. With the Taurus fan, you must kill the low speed in order to run high speed. I can fix this with another relay to isolate the low speed circuit when high kicks on.
Installed the low speed cutout relay and tested by unplugging the fan and letting the van idle. Eventually the radiator got hot enough to switch to high speed. Plugged the fan in and found high speed to draw about 40 amps. Once the temp dropped, the fan switched right over to low speed and was drawing about 14.3 amps.
Side note: Part of the reason for doing this mod is to help with warm up times in the fall, winter and spring. When the defroster is selected the A/C compressor kicks on and off intermittently. This causes the fan to turn on. What I did for now was to pull the A/C enable relay from the fuse block. The permanent fix will be to install a winter/summer switch to disable the fan from turning on every time the compressor kicks on in winter. I still want the A/C in winter to help with defrosting as it works better this way plus keeps the compressor lubed for longevity. Look for pics this week.