
Homebrew Con-Ferr Style Porthole Roof Rack Build
-
97CargoCrawler
Topic author - I sleep in my van
- Posts: 754
- Joined: Thu Jan 24, 2008 11:50 pm
- Location: Near Los Angeles, CA
- Contact:
Re: Homebrew Con-Ferr Style Porthole Roof Rack Build
I have also considered expanded steel as an alternative for the rack flooring. I think If I got some expanded steel thick enough to walk on it would weigh more than the aluminum.
Just for reference,
16ga. expanded steel with diamonds 3/4" long weighs 0.50lbs/sq.ft. This would bend under the weight of a medium sized dog if it were supported with bars spaced 24" apart.
10ga. expanded steel with 3/4" long diamonds weighs 1.80lbs/sq.ft. 10ga. steel is just about the same thickness as 1/8" aluminum. The 6061-T6 1/8" thick aluminum I bought weighs 1.854lbs/sq.ft. as a solid sheet.
It is possible that I could use thin expanded metal to cut the weight IF it was secured well enough on 24" spaced supports. It would probably require a bolt every few inches so that the steel was very taught. The instant it's allowed to flex it will deform. If it's not allowed to flex the steel would actually have to stretch in order to deform. From what I have read on other forums the expanded metal is a bitch to keep quiet, it rattles like crazy and requires too many anchors to be worthwhile. In my application, since I want it to fully support my weight, I would have to add so much hardware to anchor it it would certainly approach or exceed the weight of the aluminum sheets I bought.
Just food for thought. I have read many threads on roof rack builds elsewhere and the consensus is you need aluminum diamond plate if you want a nice weight to storage capacity ratio. Anything else will have major drawbacks. Plywood thick enough to support a decent load is also extremely heavy and obviously warps with moisture. 2X4's have the same problem. Synthetic and treated woods might last a little bit longer but are also heavy. Kennel and chicken coop floor tiles work OK but also require a lot of supports and may not last very long due to UV exposure. Fiberglass grated tiles appear to fulfill the strength and UV exposure requirements but are also extremely heavy in any thickness that could support a decent load. The options increase exponentially if your load across the entire surface area of the rack is less than the weight of an adult human. Your rack construction doesn't need to be as strong and you could get by with thin aluminum tubing. The rack could weigh potentially 1/4 the maximum load capacity. This is the sort of rack you'd find on a Lexus SUV toting snowboards. Not what you'd find on a serious off-road vehicle in the jungle.
Is my rack extreme overkill for a pavement princess? YOU BET. Will it ever find it's way into the outback jungle....not likely on this vehicle. Will my gas mileage take a huge hit? DEFINITELY. Do I care? NOPE. Will it look cool? I HOPE SO.
Anyway, the work continues....
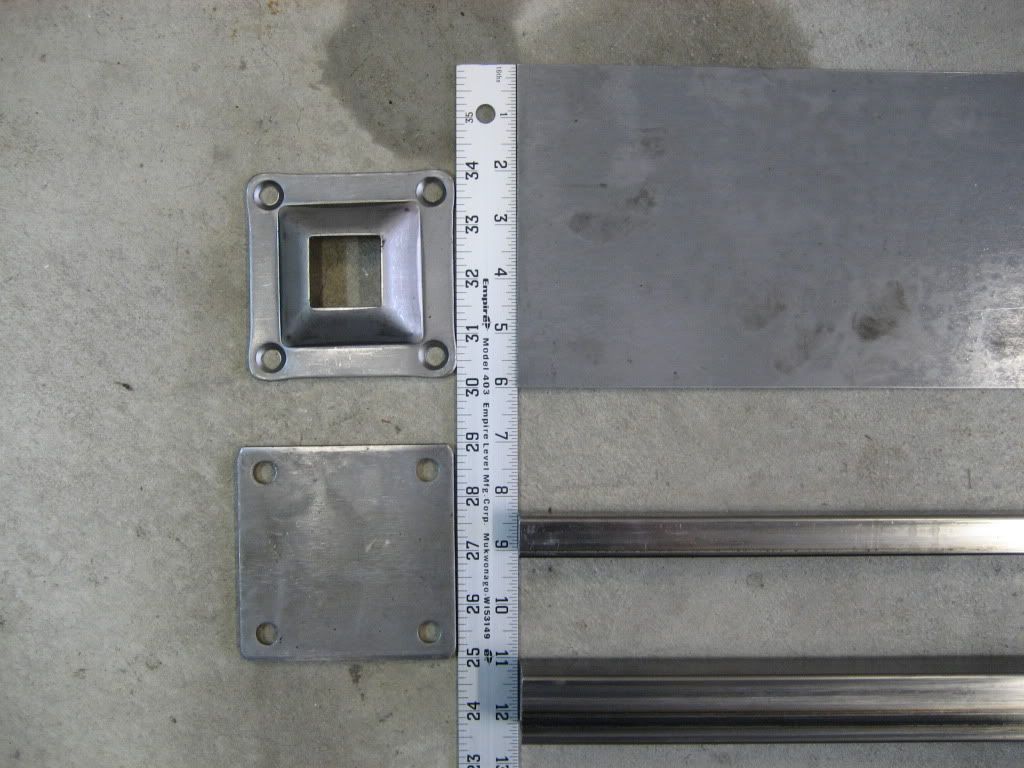
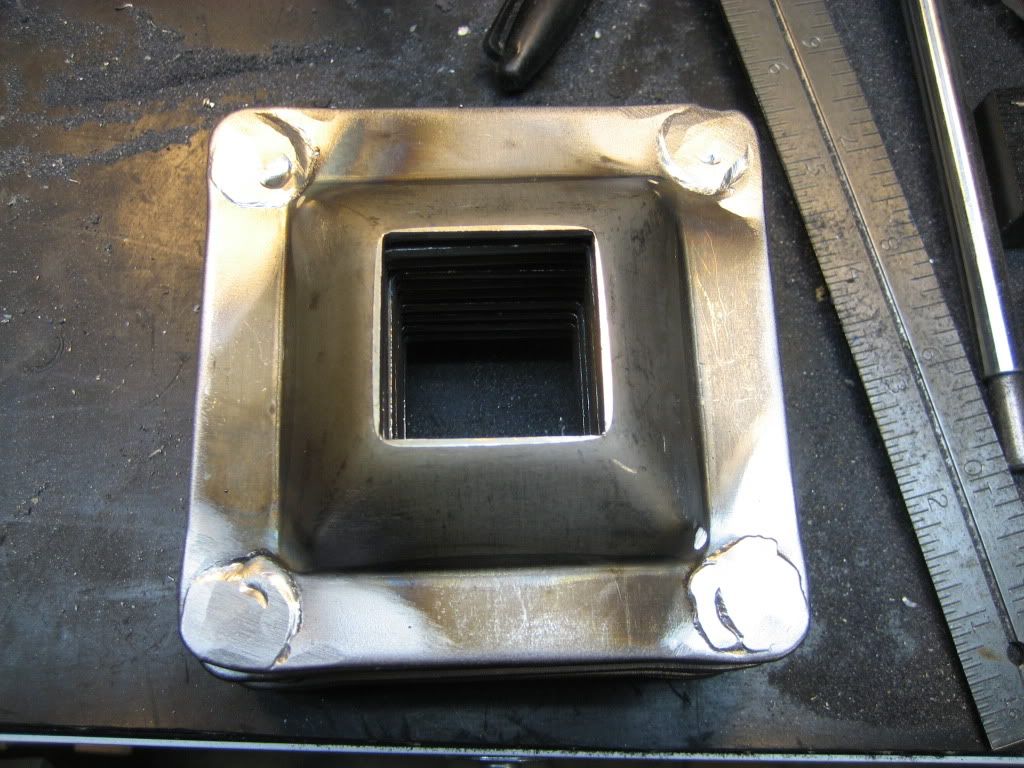
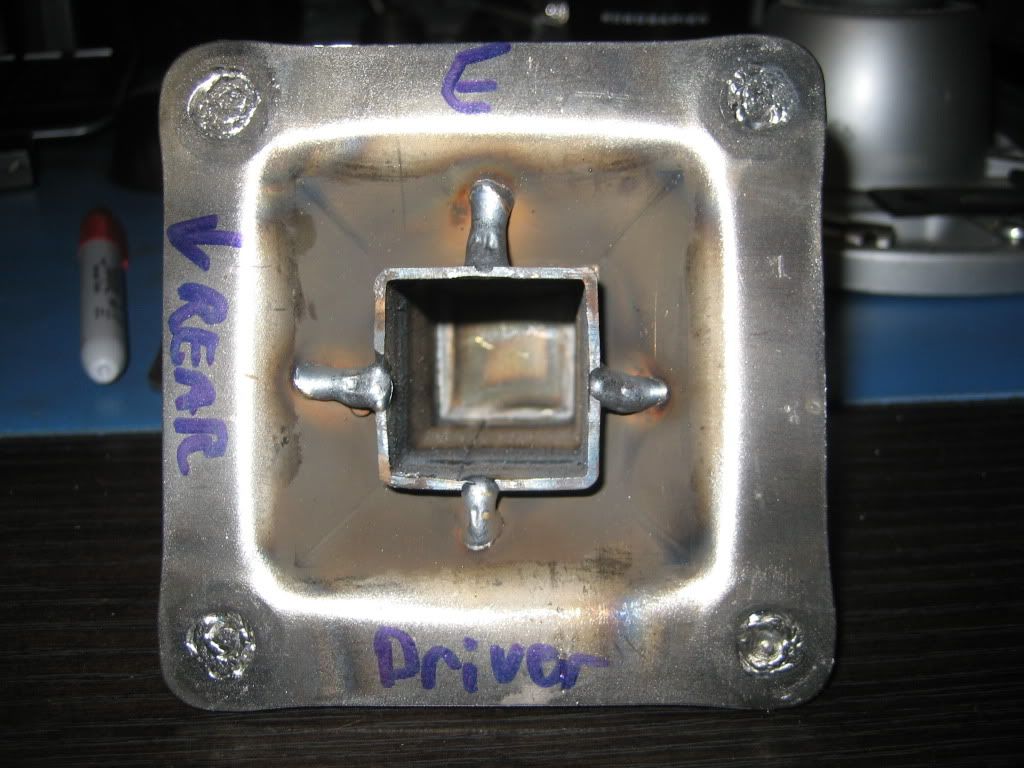
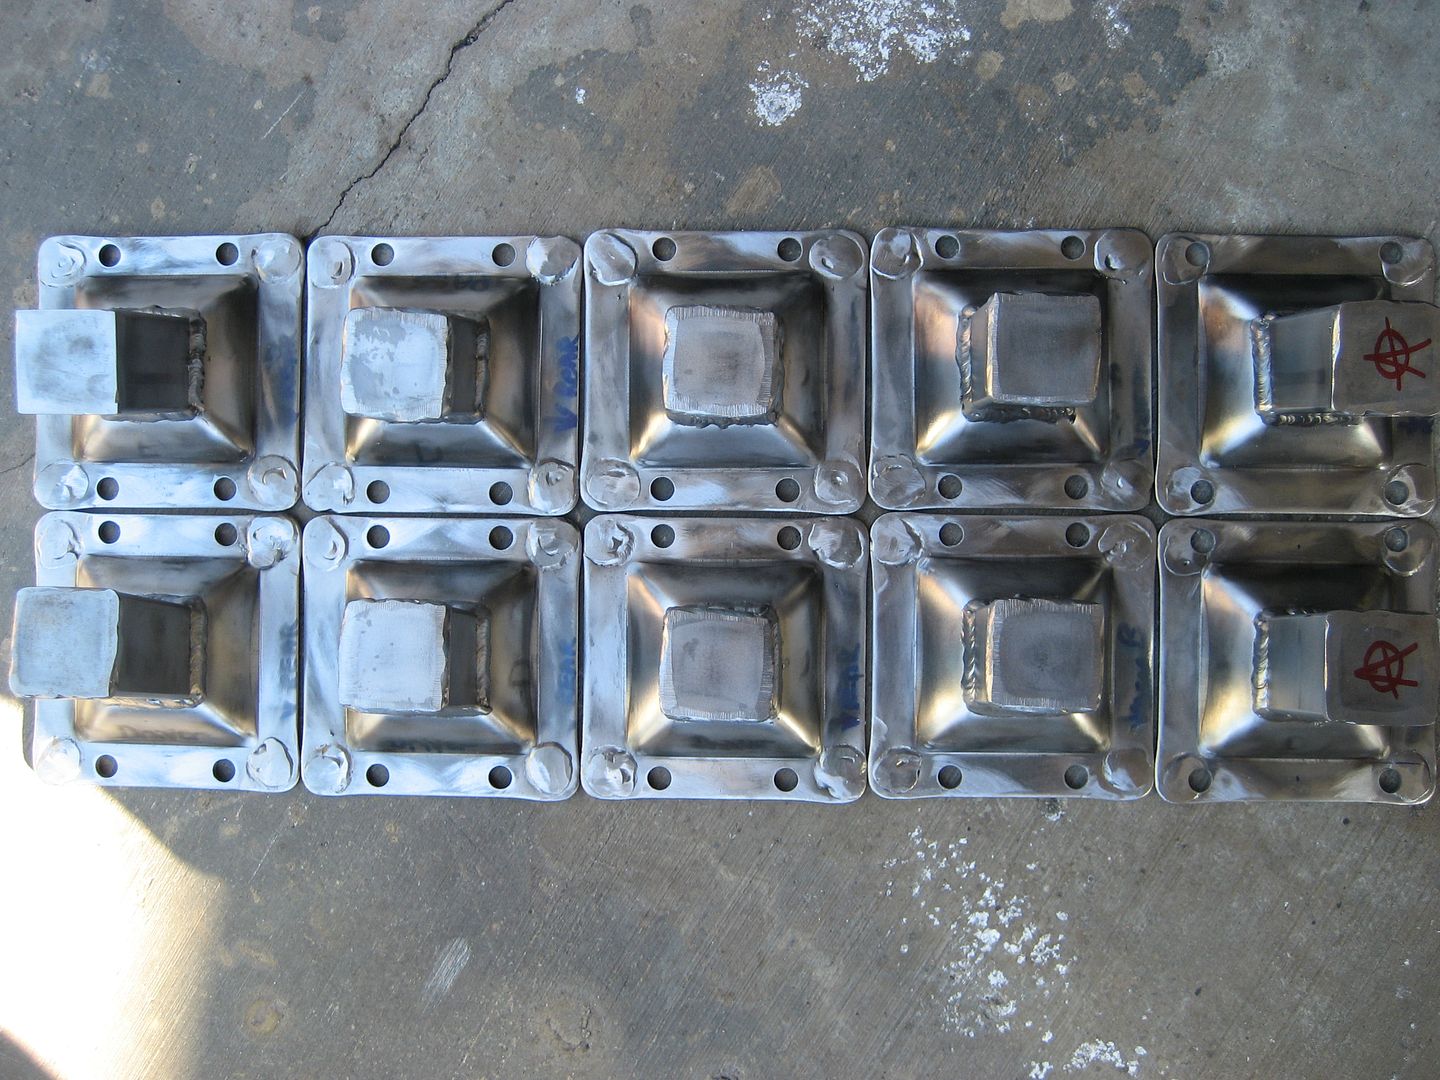
I have been working on the feet for the rack today. They are beefy. 3/16" steel plates with 16ga. 1.25" square steel tubing for the upright leg section. I believe these plates are for fence posts or something like that. They were prefab and just sitting in a bin at the metal shop. Unfortunately the holes are about 1" spaced too far out to match up with the width of the vans roof cross member, or at least the part of the cross member I want to use.
I welded up the holes. The plate needs to be water tight when bolted to the roof. I will use rubber pads and lots of silicone underneath the plate too. You can see the plate with holes here (I'm not using the matching flat backing plate):
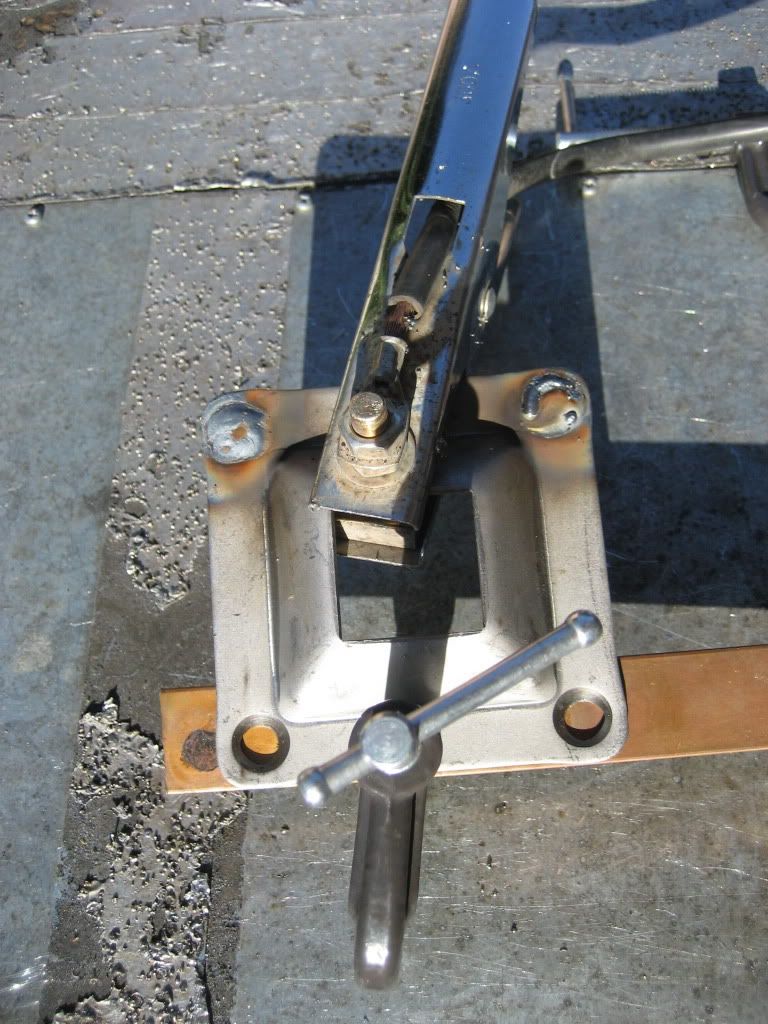
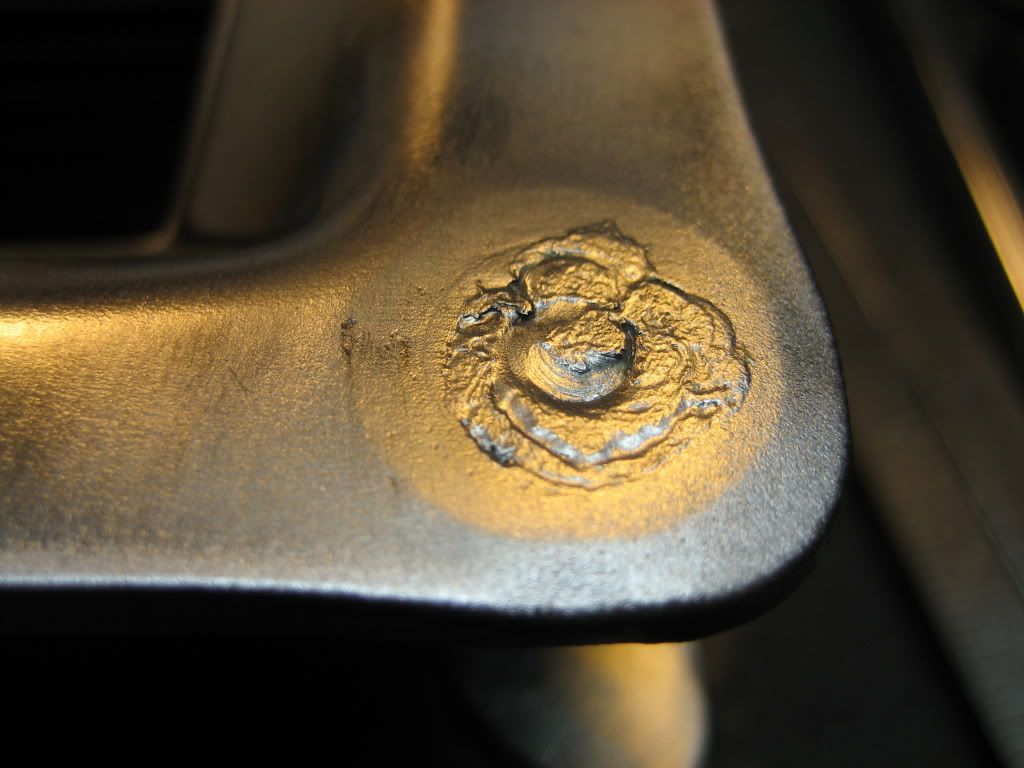
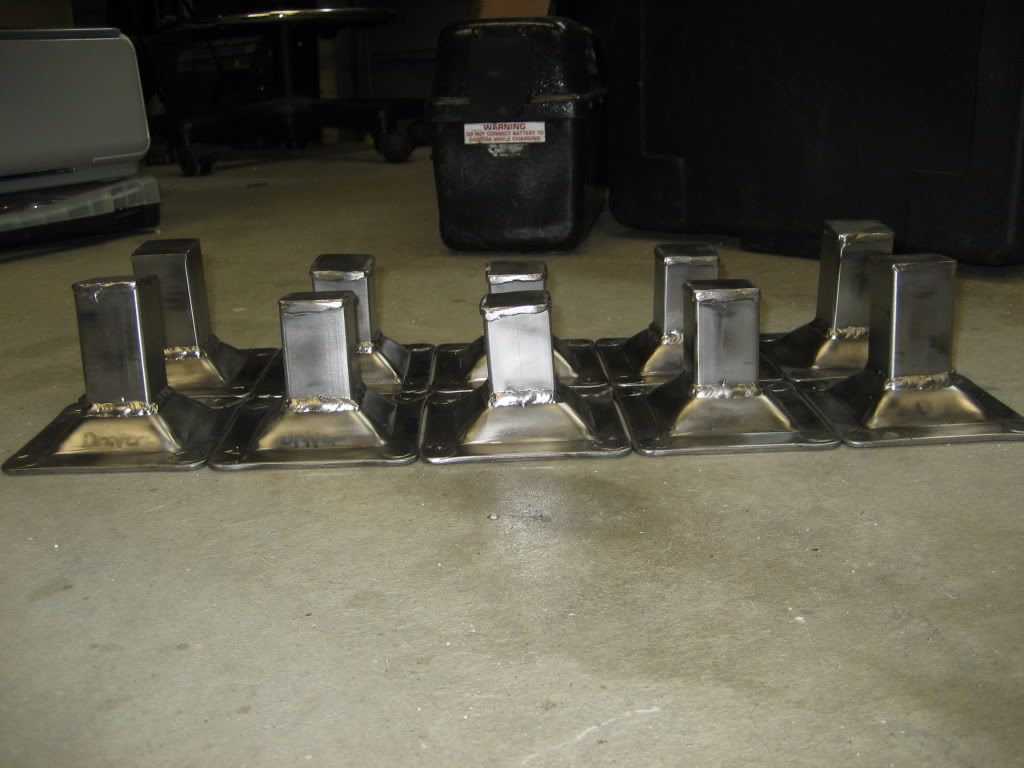
I still need to drill new holes in these plates but here you can see how much work is going into each one (note the copper backing so I could fill in the holes with no sticking):
The top of each leg needs a cap to be water tight. The legs might fall under one of the holes in the strut and I don't water getting down inside these:
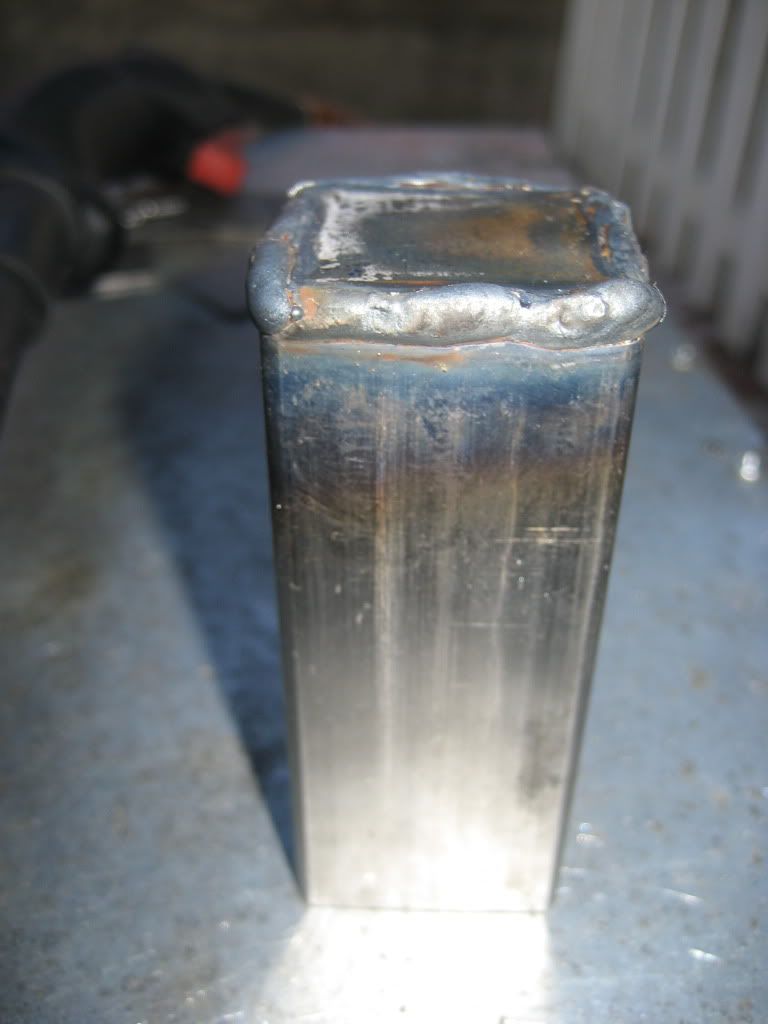
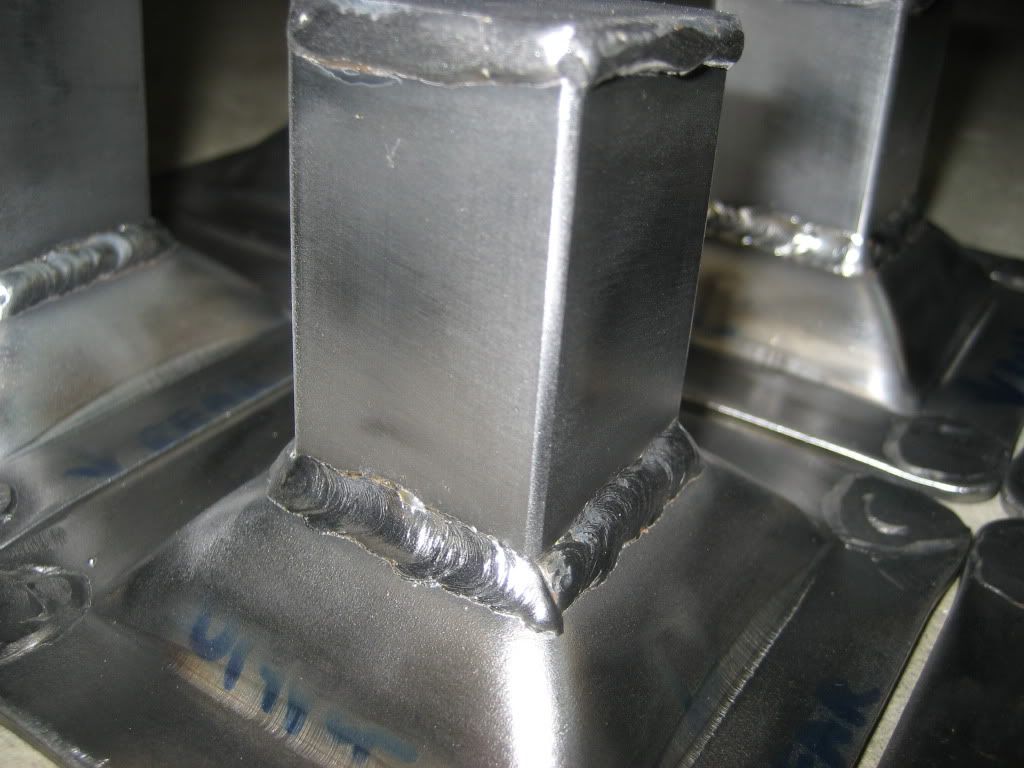
It wasn't necessary to grind them nice and square considering each side is going to have a fillet weld over it to the strut that will sit on top of the leg:
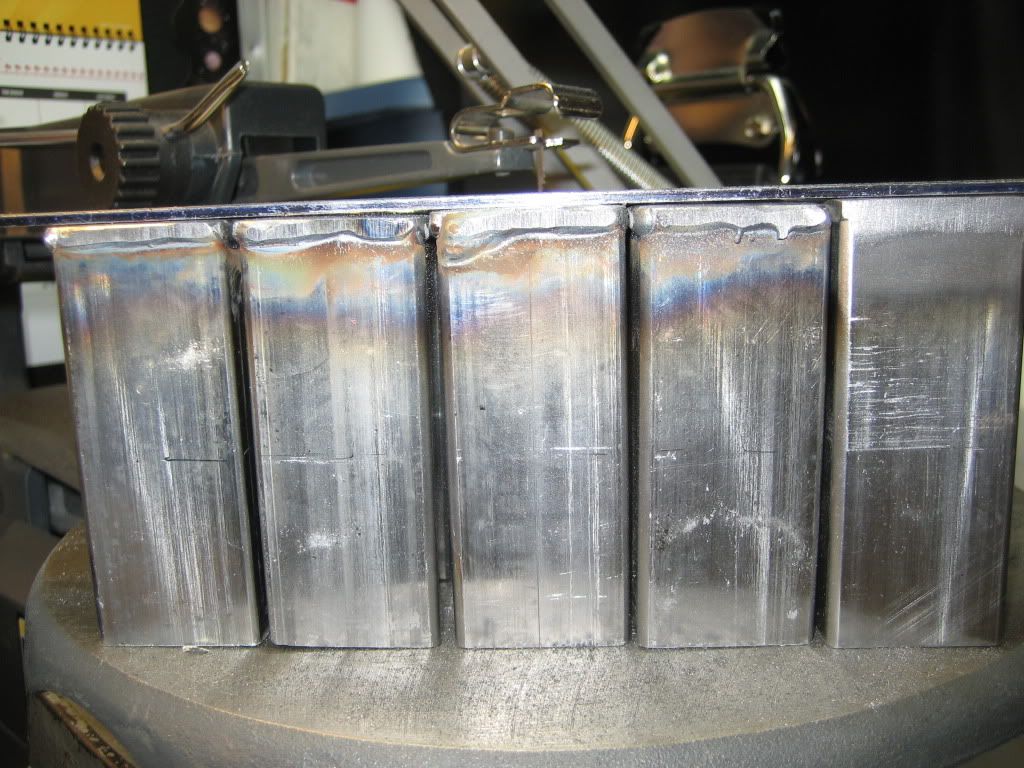
I ground the welds in the plates down just a bit. These pieces are not really cosmetic being on top of the roof but I did it anyway. They are not perfect because they don't need to be:

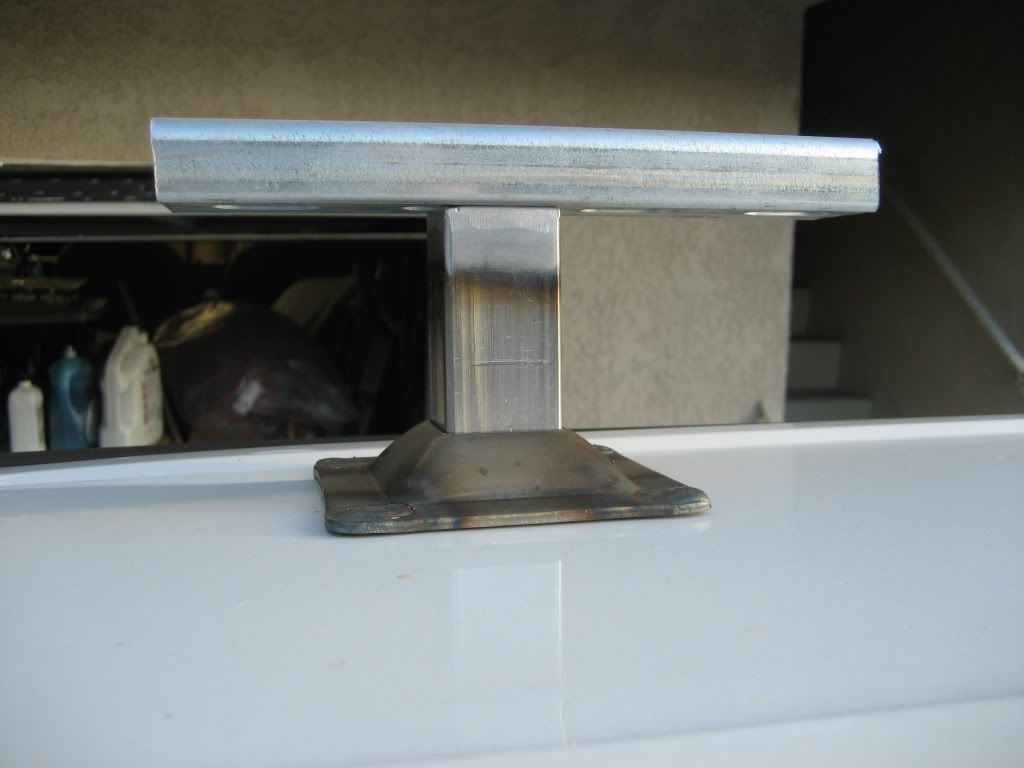
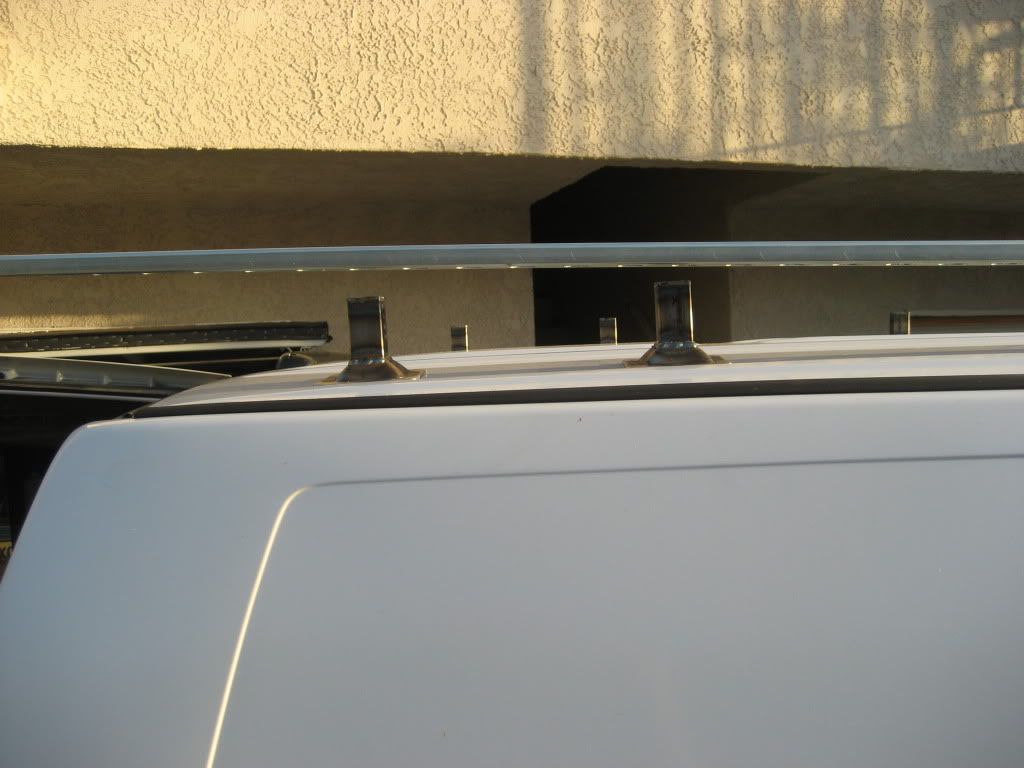
I like this design because it allows me to easily account for the curvature of the roof. The tubing can sit at an angle inside the plate. All I need to do is place it on the roof, bolt a bar across the roof to a foot on the other side and tack weld them in place to get the correct angle. Once I have the angles set then I need to figure out the spacing that corresponds to the vans roof cross members and weld these feet to a strut rail that will stretch lengthwise down each side of the roof. The general idea:
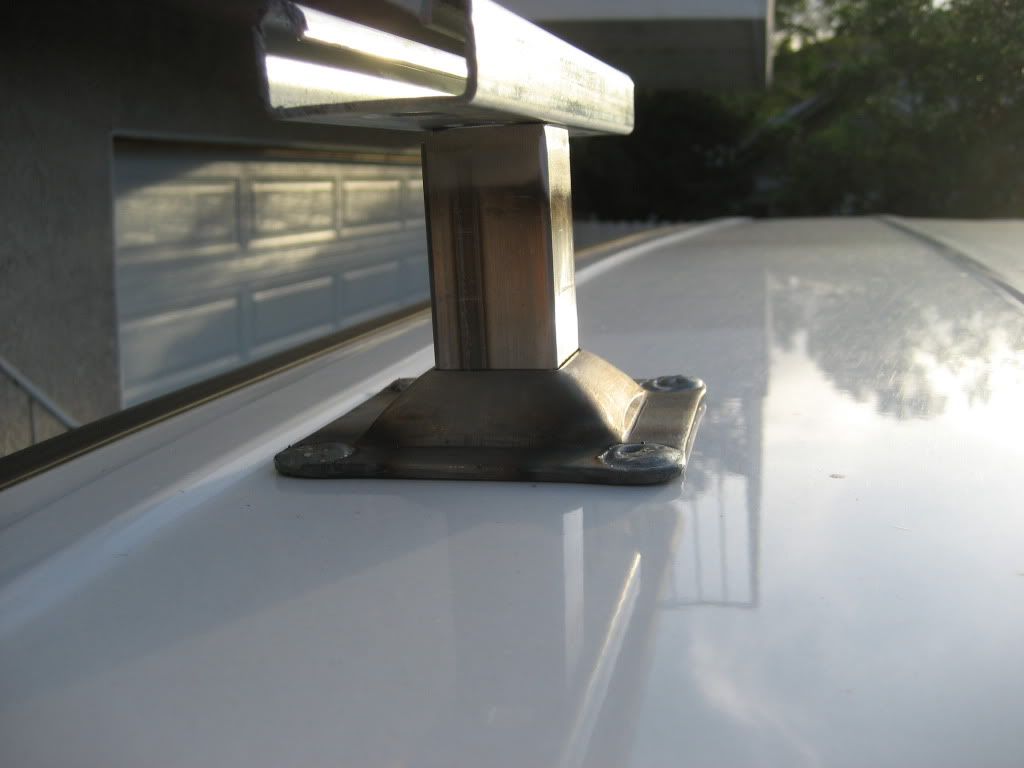
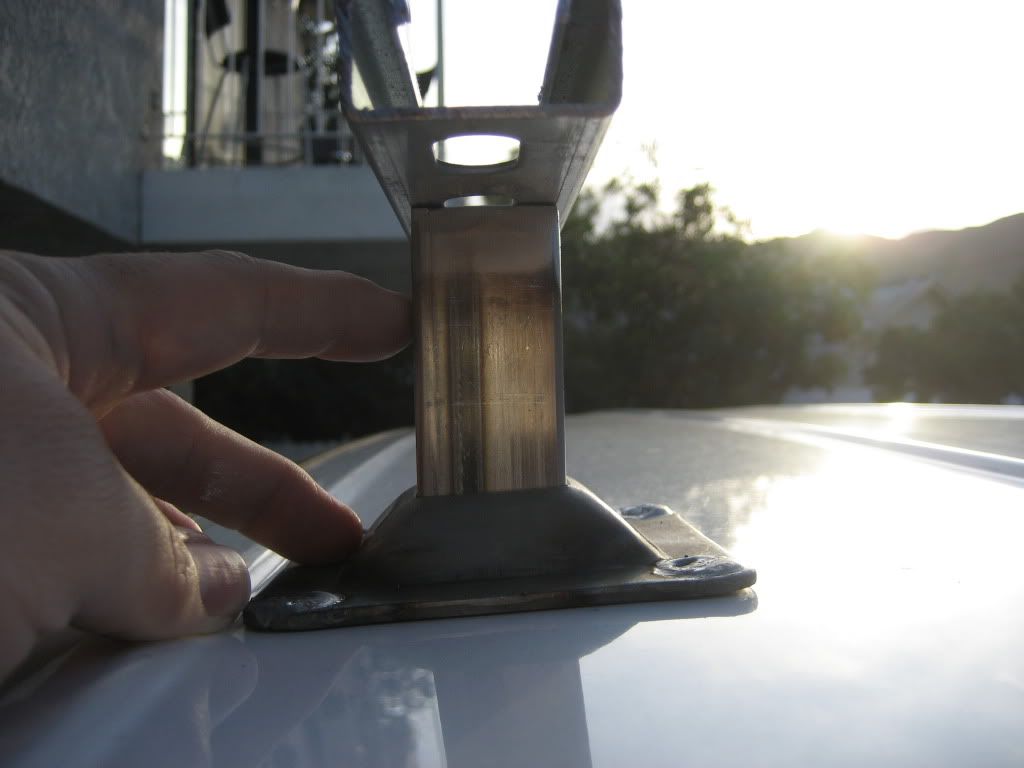
I'm leaving about 3" of space between the roof and the bottom of the rack. I want to be able to get in there to wash the roof and I also have a vent/roof hatch that's going on top too. I don't have it in my possession yet so I'm not sure exactly how tall it is, but regardless I don't want more than 3". This puts the top of the rack at almost 10" off the roofs surface.
Tomorrow I will figure out the new hole spacing for the plates and get the tubes angled properly and welded in place. Then I need to figure out where to drill the holes in the roof. Once I have all of these in place and bolted to the roof I can set the strut channel down on top and mark where the feet fall along the rail. I might tack it in place while they are on the roof.
I'd say I'm about 3/4 done with the whole project. Exciting!
Just for reference,
16ga. expanded steel with diamonds 3/4" long weighs 0.50lbs/sq.ft. This would bend under the weight of a medium sized dog if it were supported with bars spaced 24" apart.
10ga. expanded steel with 3/4" long diamonds weighs 1.80lbs/sq.ft. 10ga. steel is just about the same thickness as 1/8" aluminum. The 6061-T6 1/8" thick aluminum I bought weighs 1.854lbs/sq.ft. as a solid sheet.
It is possible that I could use thin expanded metal to cut the weight IF it was secured well enough on 24" spaced supports. It would probably require a bolt every few inches so that the steel was very taught. The instant it's allowed to flex it will deform. If it's not allowed to flex the steel would actually have to stretch in order to deform. From what I have read on other forums the expanded metal is a bitch to keep quiet, it rattles like crazy and requires too many anchors to be worthwhile. In my application, since I want it to fully support my weight, I would have to add so much hardware to anchor it it would certainly approach or exceed the weight of the aluminum sheets I bought.
Just food for thought. I have read many threads on roof rack builds elsewhere and the consensus is you need aluminum diamond plate if you want a nice weight to storage capacity ratio. Anything else will have major drawbacks. Plywood thick enough to support a decent load is also extremely heavy and obviously warps with moisture. 2X4's have the same problem. Synthetic and treated woods might last a little bit longer but are also heavy. Kennel and chicken coop floor tiles work OK but also require a lot of supports and may not last very long due to UV exposure. Fiberglass grated tiles appear to fulfill the strength and UV exposure requirements but are also extremely heavy in any thickness that could support a decent load. The options increase exponentially if your load across the entire surface area of the rack is less than the weight of an adult human. Your rack construction doesn't need to be as strong and you could get by with thin aluminum tubing. The rack could weigh potentially 1/4 the maximum load capacity. This is the sort of rack you'd find on a Lexus SUV toting snowboards. Not what you'd find on a serious off-road vehicle in the jungle.
Is my rack extreme overkill for a pavement princess? YOU BET. Will it ever find it's way into the outback jungle....not likely on this vehicle. Will my gas mileage take a huge hit? DEFINITELY. Do I care? NOPE. Will it look cool? I HOPE SO.
Anyway, the work continues....
I have been working on the feet for the rack today. They are beefy. 3/16" steel plates with 16ga. 1.25" square steel tubing for the upright leg section. I believe these plates are for fence posts or something like that. They were prefab and just sitting in a bin at the metal shop. Unfortunately the holes are about 1" spaced too far out to match up with the width of the vans roof cross member, or at least the part of the cross member I want to use.
I welded up the holes. The plate needs to be water tight when bolted to the roof. I will use rubber pads and lots of silicone underneath the plate too. You can see the plate with holes here (I'm not using the matching flat backing plate):
I still need to drill new holes in these plates but here you can see how much work is going into each one (note the copper backing so I could fill in the holes with no sticking):
The top of each leg needs a cap to be water tight. The legs might fall under one of the holes in the strut and I don't water getting down inside these:
It wasn't necessary to grind them nice and square considering each side is going to have a fillet weld over it to the strut that will sit on top of the leg:
I ground the welds in the plates down just a bit. These pieces are not really cosmetic being on top of the roof but I did it anyway. They are not perfect because they don't need to be:
I like this design because it allows me to easily account for the curvature of the roof. The tubing can sit at an angle inside the plate. All I need to do is place it on the roof, bolt a bar across the roof to a foot on the other side and tack weld them in place to get the correct angle. Once I have the angles set then I need to figure out the spacing that corresponds to the vans roof cross members and weld these feet to a strut rail that will stretch lengthwise down each side of the roof. The general idea:
I'm leaving about 3" of space between the roof and the bottom of the rack. I want to be able to get in there to wash the roof and I also have a vent/roof hatch that's going on top too. I don't have it in my possession yet so I'm not sure exactly how tall it is, but regardless I don't want more than 3". This puts the top of the rack at almost 10" off the roofs surface.
Tomorrow I will figure out the new hole spacing for the plates and get the tubes angled properly and welded in place. Then I need to figure out where to drill the holes in the roof. Once I have all of these in place and bolted to the roof I can set the strut channel down on top and mark where the feet fall along the rail. I might tack it in place while they are on the roof.
I'd say I'm about 3/4 done with the whole project. Exciting!
1997 SAFARI 2WD CARGO

"I do not think there is any thrill that can go through the human heart like that felt by the inventor as he sees some creation of the brain unfolding to success... Such emotions make a man forget food, sleep, friends, love, everything." Nikola Tesla
"I do not think there is any thrill that can go through the human heart like that felt by the inventor as he sees some creation of the brain unfolding to success... Such emotions make a man forget food, sleep, friends, love, everything." Nikola Tesla
-
 Krank88
- I finally get the smurf thing
- Posts: 140
- Joined: Tue Apr 08, 2008 9:42 am
- Location: Mississippi Gulf Coast
Re: Homebrew Con-Ferr Style Porthole Roof Rack Build
Yes, it is definitely going to look cool and be functional. And you will also have it in an emergency.
During Hurricane Katrina I had to leave the coast in a hurry at the last minute. All flat beds and moving vans were long gone. I had to leave my electronics and other stuff behind when I left. I would love to have had this roof rack.
Since you live in a disaster zone, you will have the peace of mind that you can leave in a hurry and take your important possessions.
Very well planned, constructed and documented. Kudos.
88 astro high top Sherrod conversion, Rebuilt 4.3z
-
97CargoCrawler
Topic author - I sleep in my van
- Posts: 754
- Joined: Thu Jan 24, 2008 11:50 pm
- Location: Near Los Angeles, CA
- Contact:
Re: Homebrew Con-Ferr Style Porthole Roof Rack Build
Thank you Krank! I should be able to pull up to my balcony and only have about a foot to step down onto the rack. I could get everything out of the house in no time, problem is all my stuff worth saving is in the garage!

-
Krank88
- I finally get the smurf thing
- Posts: 140
- Joined: Tue Apr 08, 2008 9:42 am
- Location: Mississippi Gulf Coast
Re: Homebrew Con-Ferr Style Porthole Roof Rack Build
A matching flat bed will be needed. 
88 astro high top Sherrod conversion, Rebuilt 4.3z
-
97CargoCrawler
Topic author - I sleep in my van
- Posts: 754
- Joined: Thu Jan 24, 2008 11:50 pm
- Location: Near Los Angeles, CA
- Contact:
Re: Homebrew Con-Ferr Style Porthole Roof Rack Build
Here we gooooooooooo....
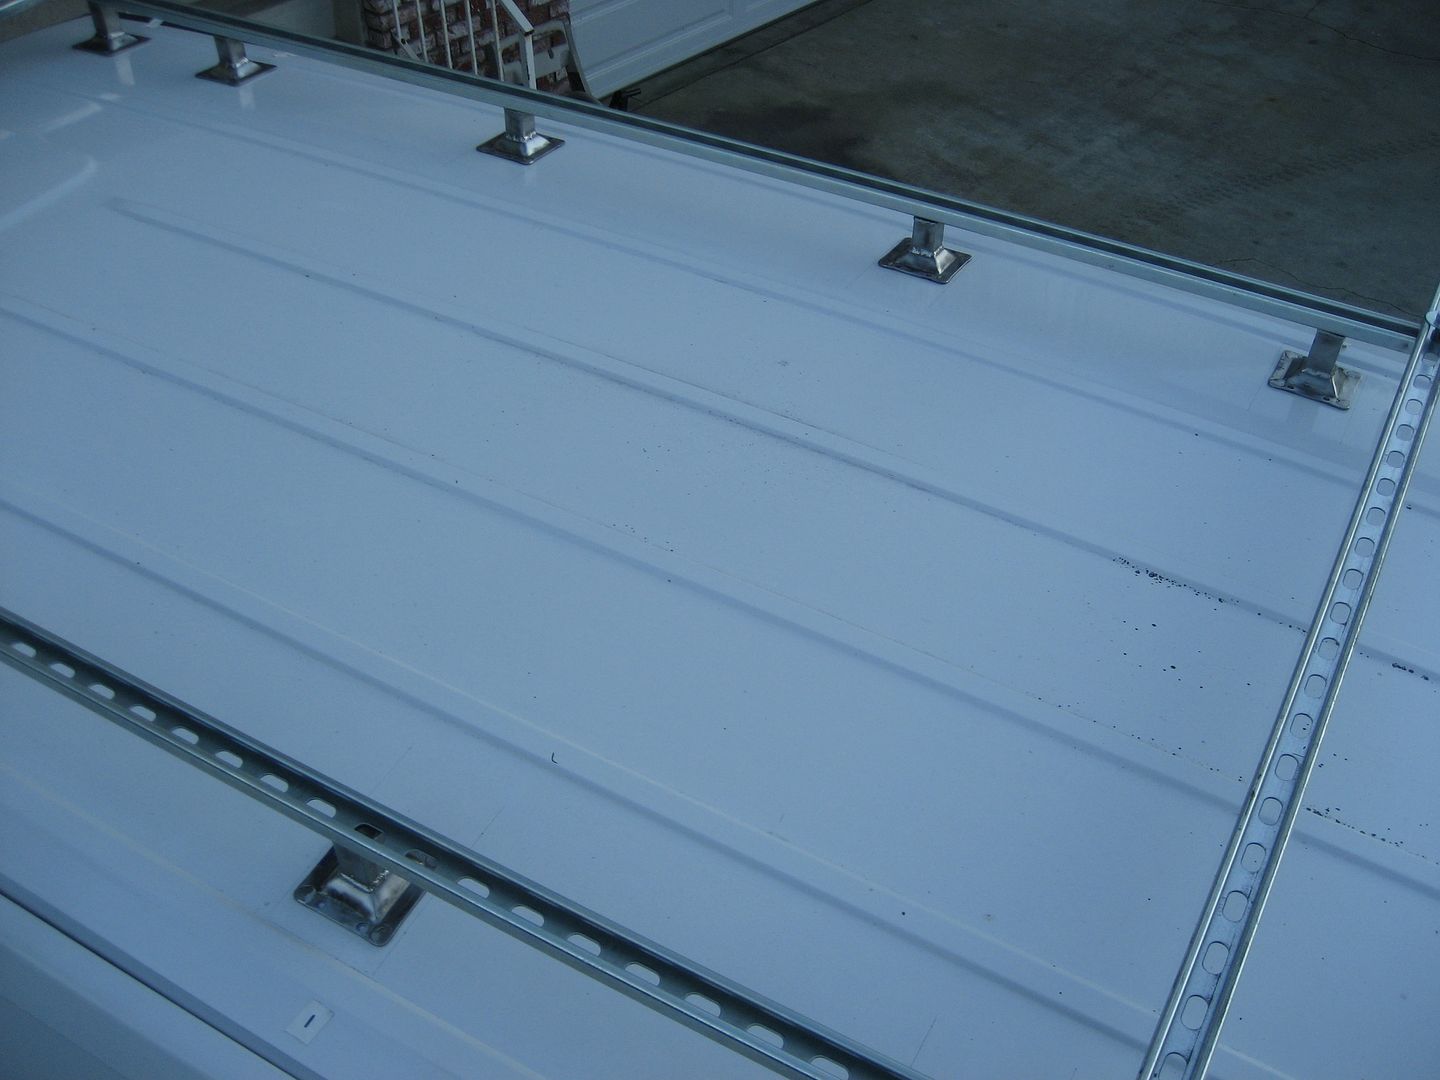
So I have discovered that I'm pretty much putting a flat rack on top of a spherical roof. It's been a bit of a PITA but I have it under control.
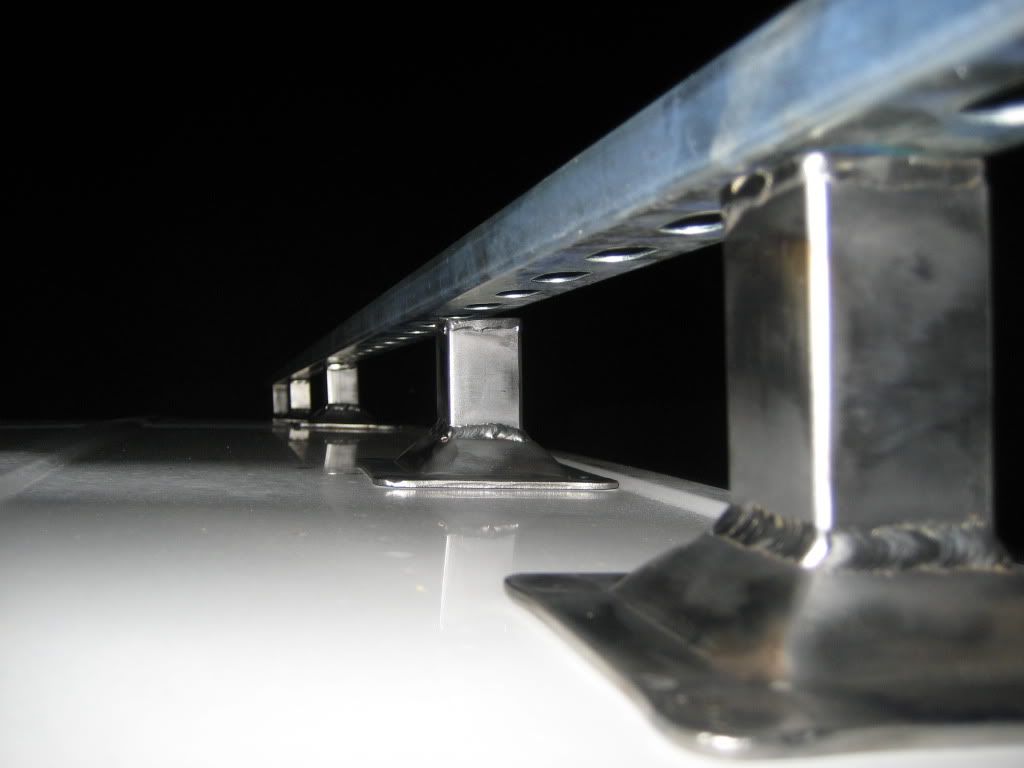
I knew the roof curved from left to right but not front to back as well. I cut all of the legs for the roof supports 3" long. With the rail just sitting on the center supports this is what the front and back look like:
So clearly the roof curves quite a bit, it must be between 1/2in to 1in higher in the center. I rested the rail on the front and rearmost leg with the centers off to the side. I then marked where the bottom of the rail touched them, cut them down accordingly and welded them up.
Here you can see the center legs are shorter since the roof arches up:
I didn't bother squaring up the tops since they are just getting welded again to the rails. The tops are perfectly flat. I'm guessing the curvature of the roof also varies front to back considering the angles of these legs don't all match. I was pretty careful to make sure the angles were correct before I welded them in place.

These suckers are strong:
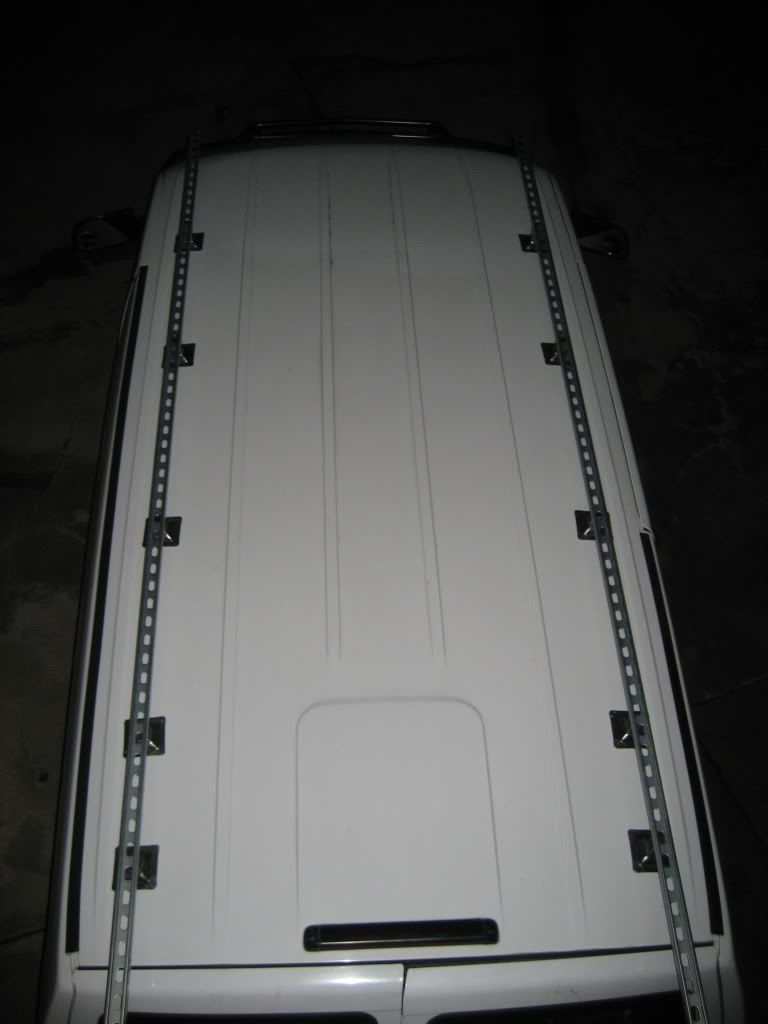
Here the rail is just sitting on top of the supports. The rail will eventually get welded to the legs. I want to drill the holes in the roof and attach the feet/legs to the roof first so the spacing is perfect. I will bolt the feet to the roof, set the rail on top and tack weld it in place.

I need to figure out the correct hole spacing and drill out the feet. Each plate will have 4 bolts. It's supposed to rain here over the next few days so I don't think I'll be drilling holes in the roof anytime soon. I'm going to make up some sort of jig that will make sure I drill a straight hole through both the van roof cross member and the roof sheet metal. I will need two templates with perfectly matching holes. One will serve to mark the hole pattern for drilling holes in the feet, the other will serve to align the drill bit through two surfaces. I will be making those up tomorrow. I also have a lot of hardware to order. I'm sticking with metric hardware to match the rest of the van and it will be stainless steel.
So I have discovered that I'm pretty much putting a flat rack on top of a spherical roof. It's been a bit of a PITA but I have it under control.
I knew the roof curved from left to right but not front to back as well. I cut all of the legs for the roof supports 3" long. With the rail just sitting on the center supports this is what the front and back look like:
So clearly the roof curves quite a bit, it must be between 1/2in to 1in higher in the center. I rested the rail on the front and rearmost leg with the centers off to the side. I then marked where the bottom of the rail touched them, cut them down accordingly and welded them up.
Here you can see the center legs are shorter since the roof arches up:
I didn't bother squaring up the tops since they are just getting welded again to the rails. The tops are perfectly flat. I'm guessing the curvature of the roof also varies front to back considering the angles of these legs don't all match. I was pretty careful to make sure the angles were correct before I welded them in place.
These suckers are strong:
Here the rail is just sitting on top of the supports. The rail will eventually get welded to the legs. I want to drill the holes in the roof and attach the feet/legs to the roof first so the spacing is perfect. I will bolt the feet to the roof, set the rail on top and tack weld it in place.
I need to figure out the correct hole spacing and drill out the feet. Each plate will have 4 bolts. It's supposed to rain here over the next few days so I don't think I'll be drilling holes in the roof anytime soon. I'm going to make up some sort of jig that will make sure I drill a straight hole through both the van roof cross member and the roof sheet metal. I will need two templates with perfectly matching holes. One will serve to mark the hole pattern for drilling holes in the feet, the other will serve to align the drill bit through two surfaces. I will be making those up tomorrow. I also have a lot of hardware to order. I'm sticking with metric hardware to match the rest of the van and it will be stainless steel.
-
97CargoCrawler
Topic author - I sleep in my van
- Posts: 754
- Joined: Thu Jan 24, 2008 11:50 pm
- Location: Near Los Angeles, CA
- Contact:
Re: Homebrew Con-Ferr Style Porthole Roof Rack Build
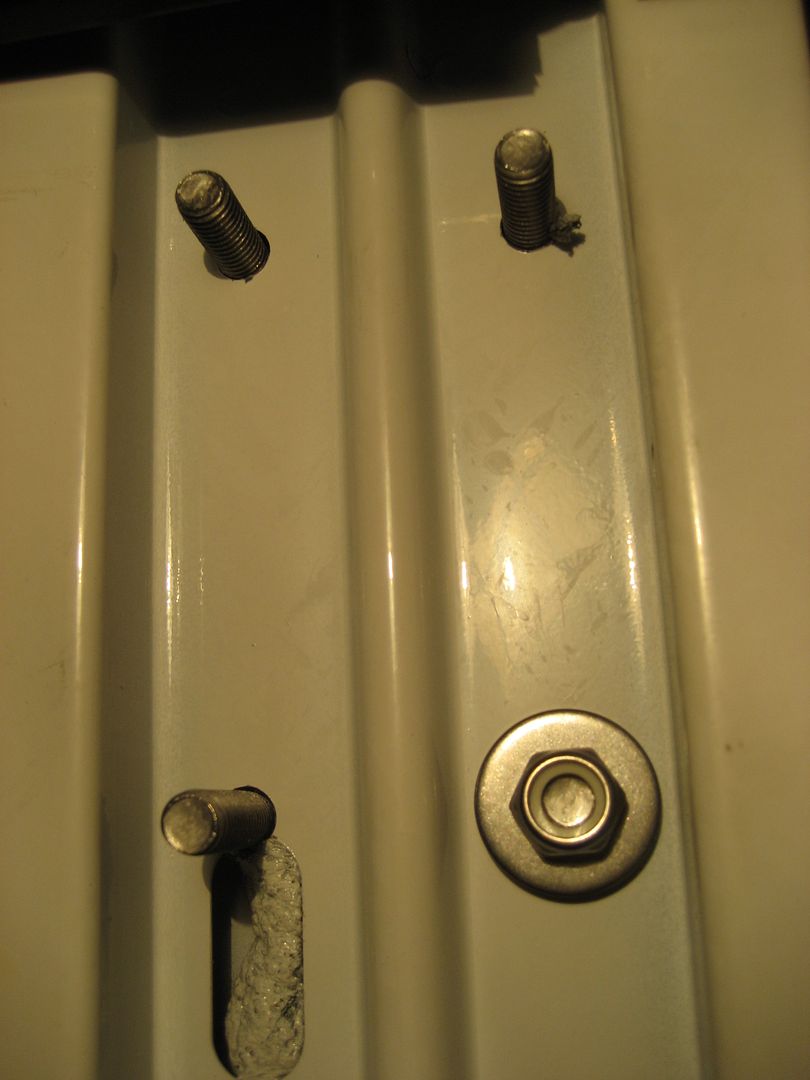
I'm still plugging along on this rack. There is so much to do, tons of holes to measure and drill. I would like all of my bolts to sit perfectly flat of the diamond plate. I don't want this:
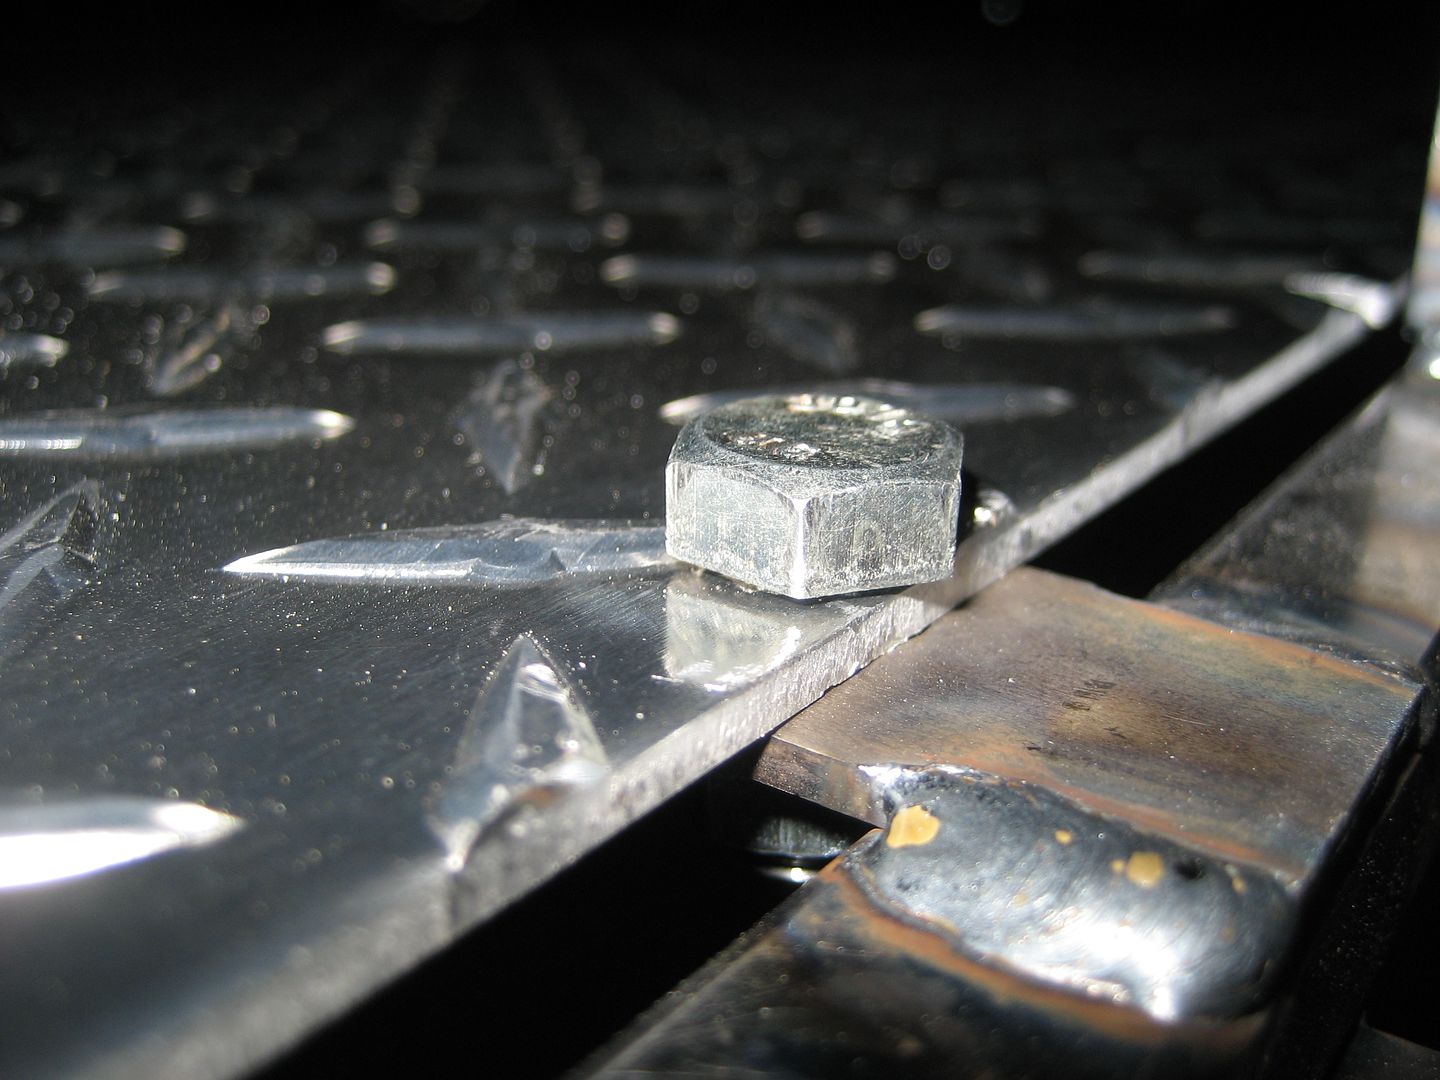
Short of using a mill to scrape around the hole what can I use to grind the part that falls under the bolt? I thought about using a spade bit but I don't want it to start cutting a bigger hole. Certainly there must be something. Maybe I can find an end mill bit that has some sort of pilot tip to keep it centered? Open to suggestions here..... I don't want to use my grinder and make it look like chit.
Today I got a very expensive care package from McMaster Carr containing the rest of my stainless steel hardware, nylon spacer plates, sealing rubber and tarp for the tent. This rack is officially worth more than the van. Seriously, I paid less for the van.
I will be using M8 stainless hardware for attaching the feet to the roof. The rest of the rack will use zinc plated standard hardware since I already have tons of it. I couldn't justify spending another $200 on bolts and metric strut nuts when I have it all in standard.
For attaching the feet:
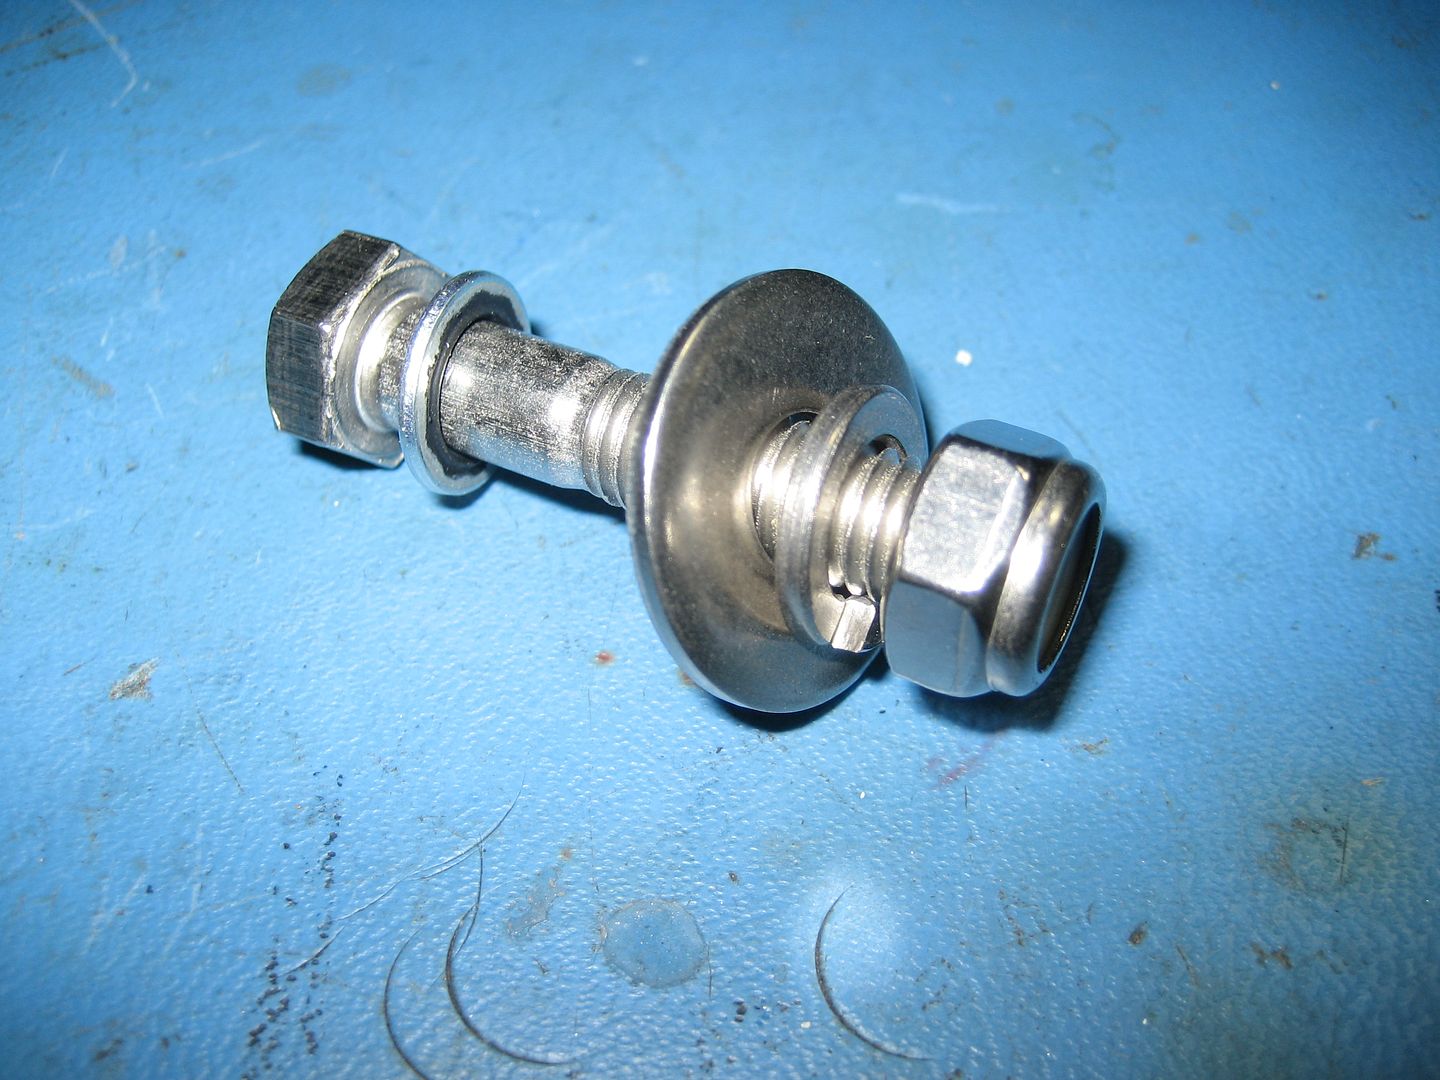
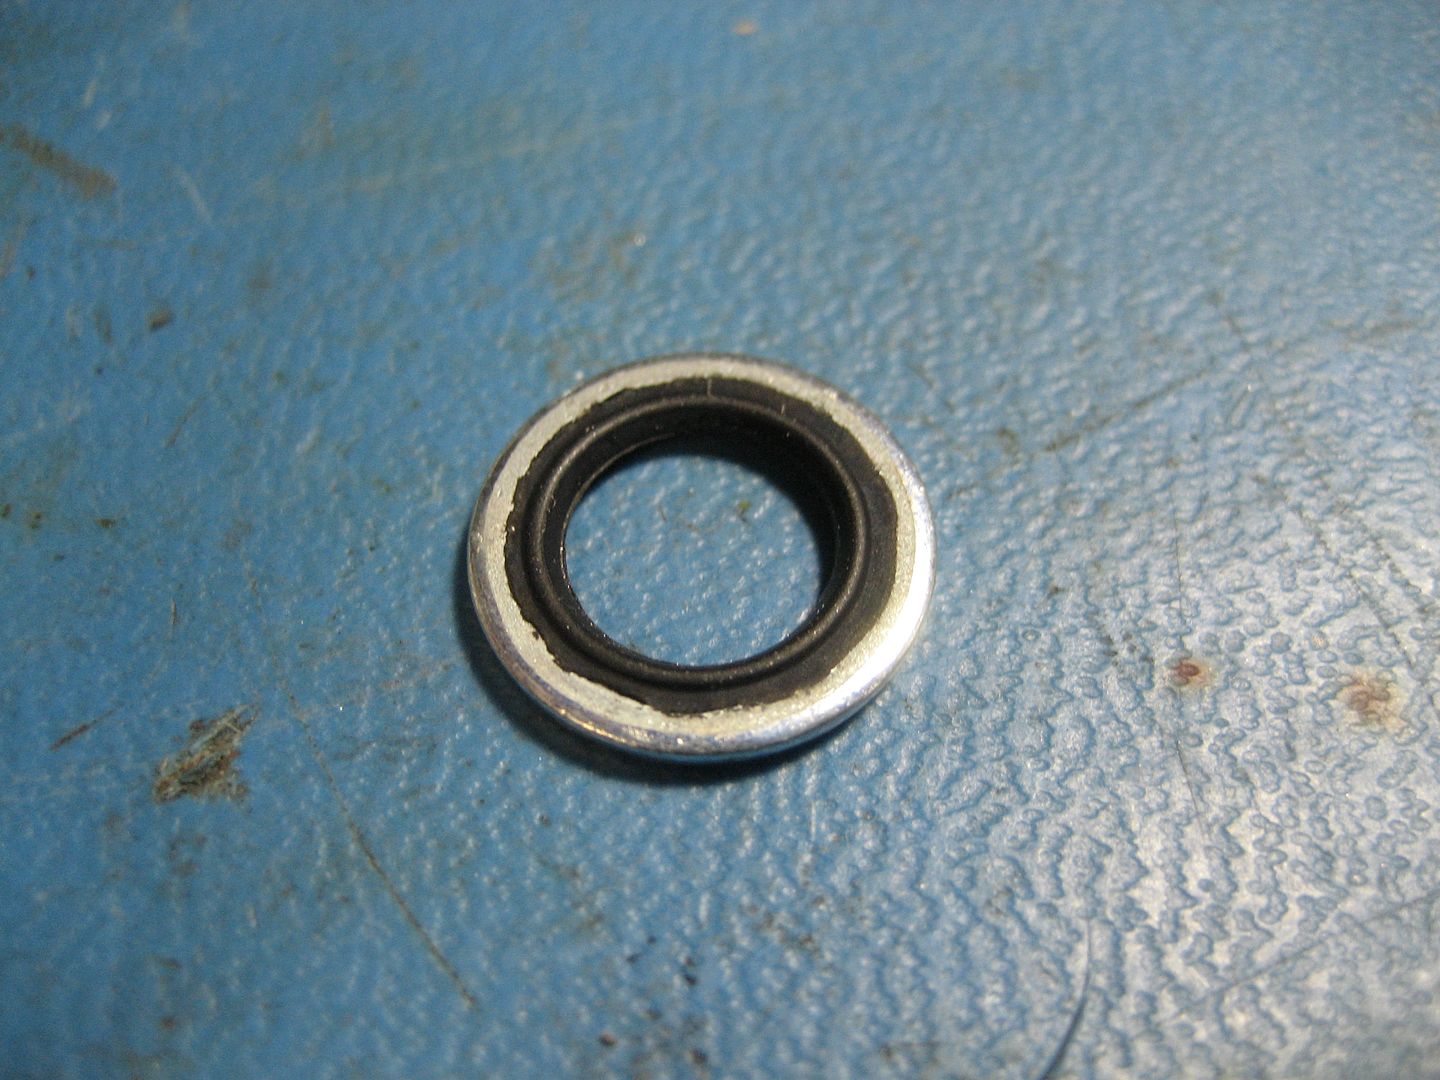
I have these little liquid tight washers that go under the bolt of the head. Of course I'm gonna silicone the crap out of everything too but I thought these would be additional insurance against water seeping in through the holes. They cost $1 each. That is nuts, even worse when you buy 40 of them:
I had wanted to use Delrin blocks for spacer material between the roof sheet metal and the cross members. As it turns out that stuff gets extremely expensive in the thickness and quantity I wanted. So I went with black 6/6 nylon instead. I need a material that I can easily machine down into angled blocks on a sander. I though about wood and MDF too but those choices seemed poor, especially if the roof ever developed a leak. The nylon was uber expensive too but about half the cost of Delrin. 4ft of 1/2" and 2ft of 3/8" cost me $115:
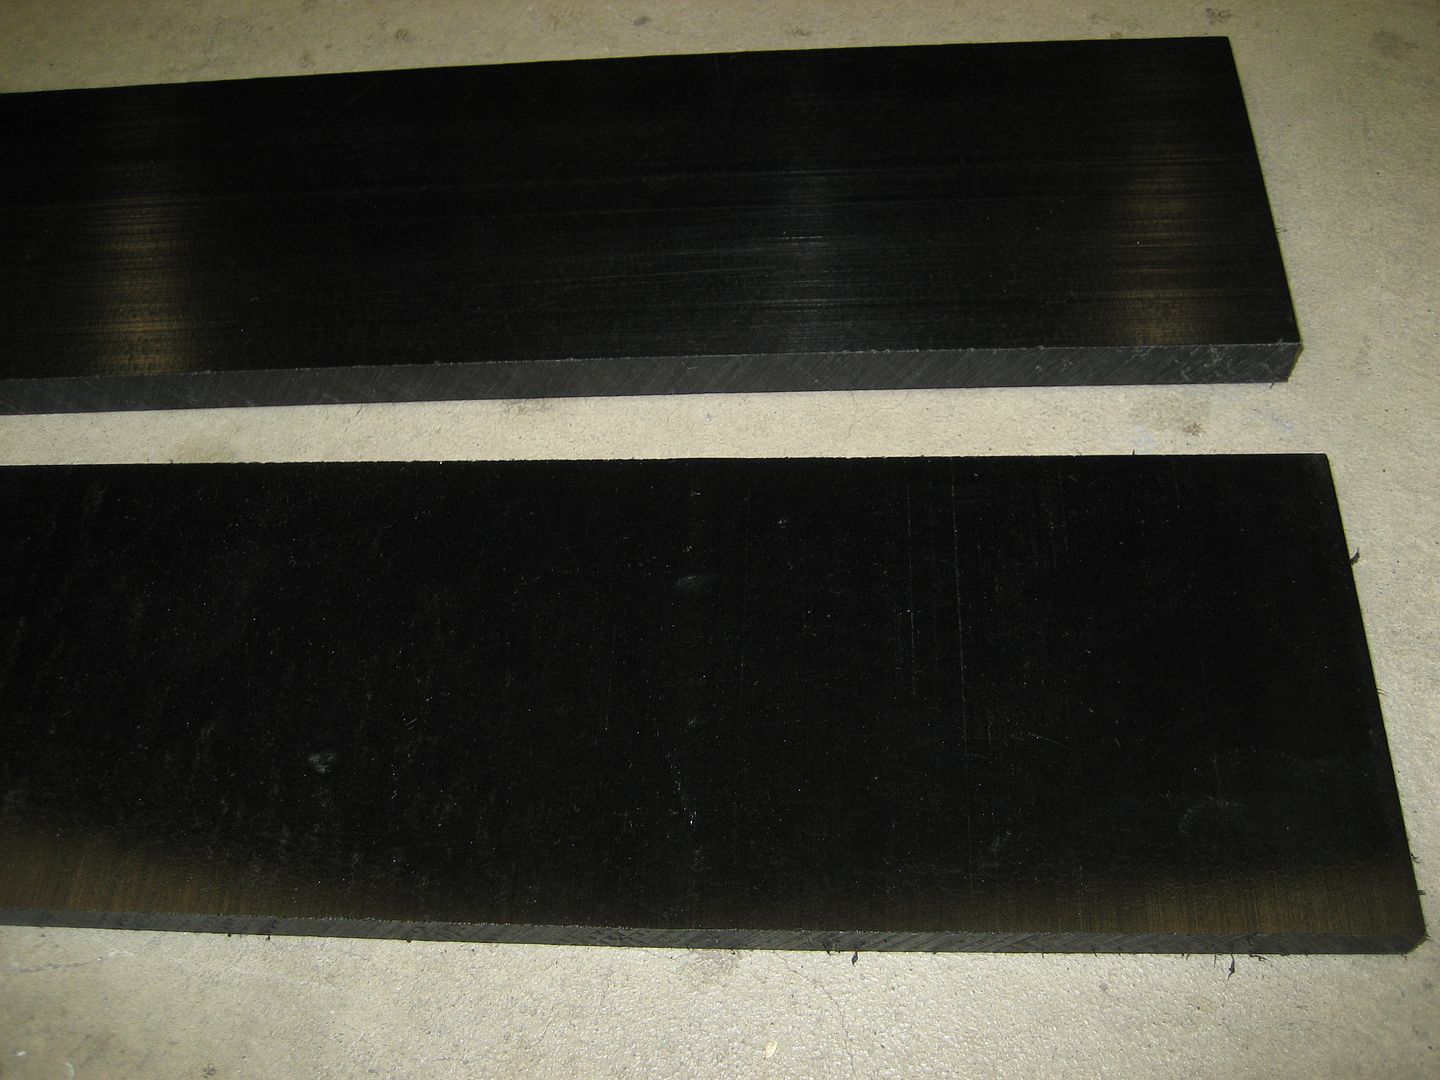
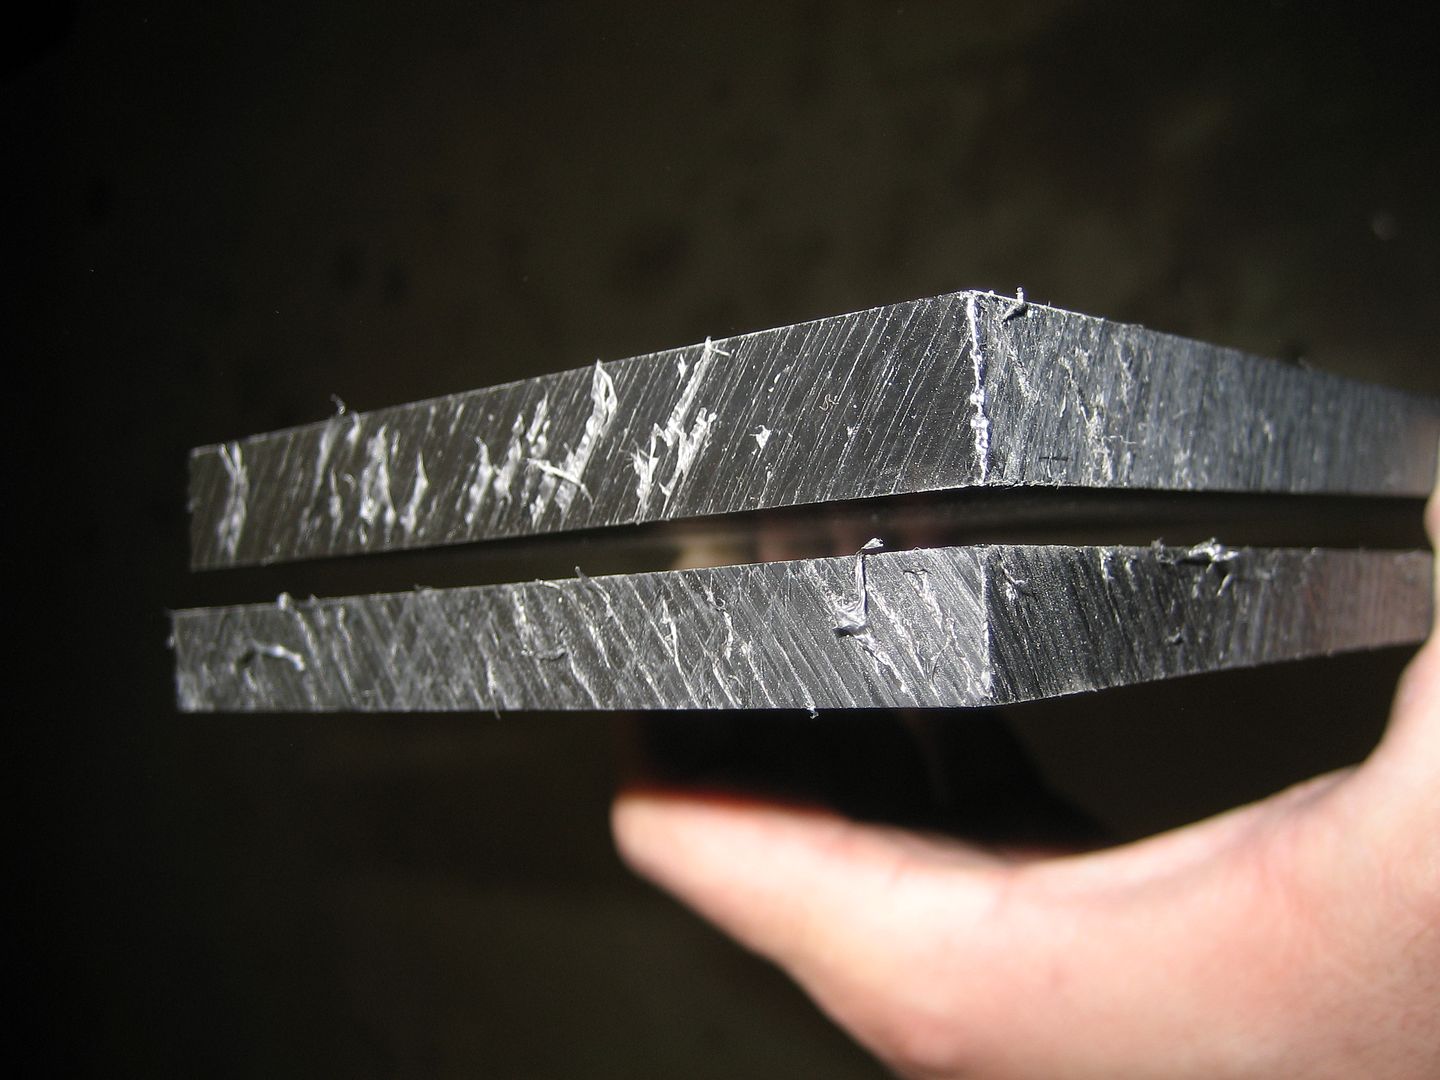
It's F'ing plastic for cripes sake...WTF? Might as well be gold plated. :shock: I bought two thicknesses because the rearmost cross member is much closer to the roof than the others.
I still have a ton of holes to drill in the diamond plate. I'm procrastinating on mounting the feet to the roof. I'm still not decided on how I'm going to do it. I want it perfect, but without x-ray vision it's going to be tough to drill through two curved (at different angles I might add) surfaces and land right where I need to be on the cross member. It's definitely a weekend procedure. I hope the weather is good this weekend.
Short of using a mill to scrape around the hole what can I use to grind the part that falls under the bolt? I thought about using a spade bit but I don't want it to start cutting a bigger hole. Certainly there must be something. Maybe I can find an end mill bit that has some sort of pilot tip to keep it centered? Open to suggestions here..... I don't want to use my grinder and make it look like chit.
Today I got a very expensive care package from McMaster Carr containing the rest of my stainless steel hardware, nylon spacer plates, sealing rubber and tarp for the tent. This rack is officially worth more than the van. Seriously, I paid less for the van.
I will be using M8 stainless hardware for attaching the feet to the roof. The rest of the rack will use zinc plated standard hardware since I already have tons of it. I couldn't justify spending another $200 on bolts and metric strut nuts when I have it all in standard.
For attaching the feet:
I have these little liquid tight washers that go under the bolt of the head. Of course I'm gonna silicone the crap out of everything too but I thought these would be additional insurance against water seeping in through the holes. They cost $1 each. That is nuts, even worse when you buy 40 of them:
I had wanted to use Delrin blocks for spacer material between the roof sheet metal and the cross members. As it turns out that stuff gets extremely expensive in the thickness and quantity I wanted. So I went with black 6/6 nylon instead. I need a material that I can easily machine down into angled blocks on a sander. I though about wood and MDF too but those choices seemed poor, especially if the roof ever developed a leak. The nylon was uber expensive too but about half the cost of Delrin. 4ft of 1/2" and 2ft of 3/8" cost me $115:
It's F'ing plastic for cripes sake...WTF? Might as well be gold plated. :shock: I bought two thicknesses because the rearmost cross member is much closer to the roof than the others.
I still have a ton of holes to drill in the diamond plate. I'm procrastinating on mounting the feet to the roof. I'm still not decided on how I'm going to do it. I want it perfect, but without x-ray vision it's going to be tough to drill through two curved (at different angles I might add) surfaces and land right where I need to be on the cross member. It's definitely a weekend procedure. I hope the weather is good this weekend.
1997 SAFARI 2WD CARGO
"I do not think there is any thrill that can go through the human heart like that felt by the inventor as he sees some creation of the brain unfolding to success... Such emotions make a man forget food, sleep, friends, love, everything." Nikola Tesla
"I do not think there is any thrill that can go through the human heart like that felt by the inventor as he sees some creation of the brain unfolding to success... Such emotions make a man forget food, sleep, friends, love, everything." Nikola Tesla
-
 MountainManJoe
- I have my van tatooed on my cheeks
- Posts: 3119
- Joined: Fri Aug 08, 2008 12:55 pm
- Location: The Pacific North Wet
- Has thanked: 47 times
- Been thanked: 25 times
Re: Homebrew Con-Ferr Style Porthole Roof Rack Build
Countersunk (is that a word?) holes and flatheat bolts would look good and keep things from getting caught on them.
-
 Smiliesafari
- ASV Supporter

- Posts: 2667
- Joined: Sat Dec 02, 2006 12:34 pm
- Location: Orlando, FL
Re: Homebrew Con-Ferr Style Porthole Roof Rack Build
I would countersink also. Urethane sealer instead of silicone. This is turning out to be a really nice rack.
1996 Safari SLX Hotair balloon transport vehicle
-
97CargoCrawler
Topic author - I sleep in my van
- Posts: 754
- Joined: Thu Jan 24, 2008 11:50 pm
- Location: Near Los Angeles, CA
- Contact:
Re: Homebrew Con-Ferr Style Porthole Roof Rack Build
I'm probably going to use countersunk 1/4" bolts for the middle anchors in the plating but these are the outer perimeter and I'm using 3/8" hardware there. I would need an undercut 3/8" flat head bolt to fit in such shallow plate. Which is doable except I was trying to use hardware I already have. I seriously just spent $300 on hardware....I'm reluctant to spend more.
I suppose I'll just touch it a bit with the grinder.
This always happens...I get to 90% completion and I start knit-picking with lame little details that prolong the project.](./images/smilies/eusa_wall.gif "Banging my head")
I suppose I'll just touch it a bit with the grinder.
This always happens...I get to 90% completion and I start knit-picking with lame little details that prolong the project.
-
97CargoCrawler
Topic author - I sleep in my van
- Posts: 754
- Joined: Thu Jan 24, 2008 11:50 pm
- Location: Near Los Angeles, CA
- Contact:
Re: Homebrew Con-Ferr Style Porthole Roof Rack Build
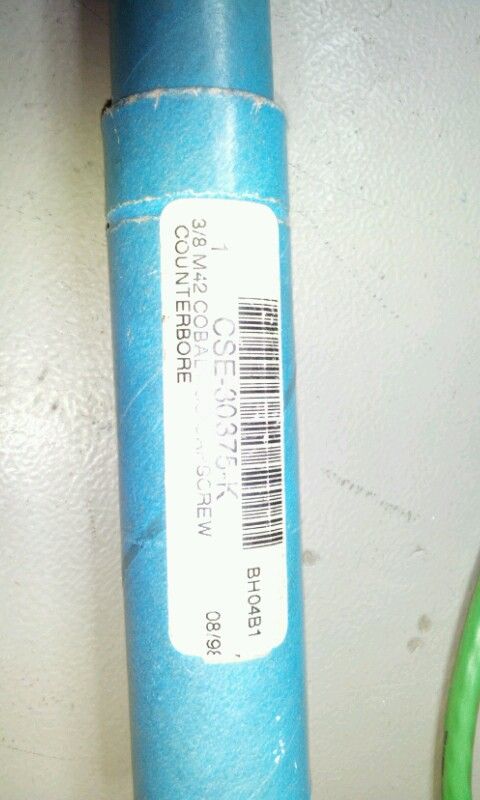
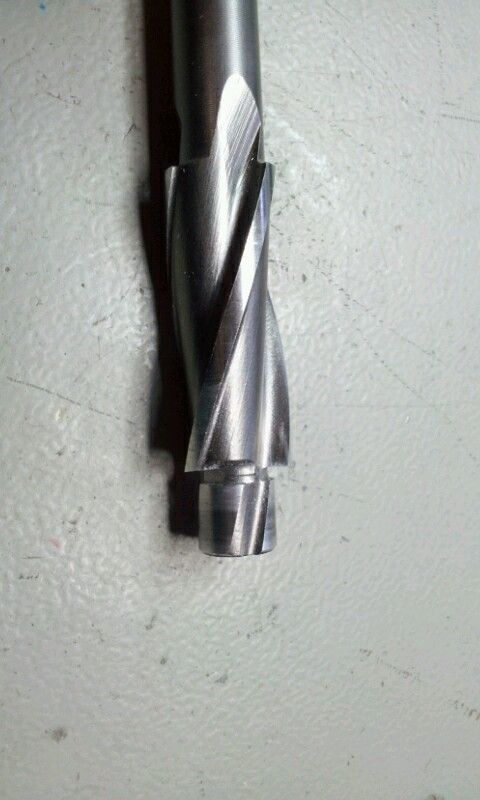
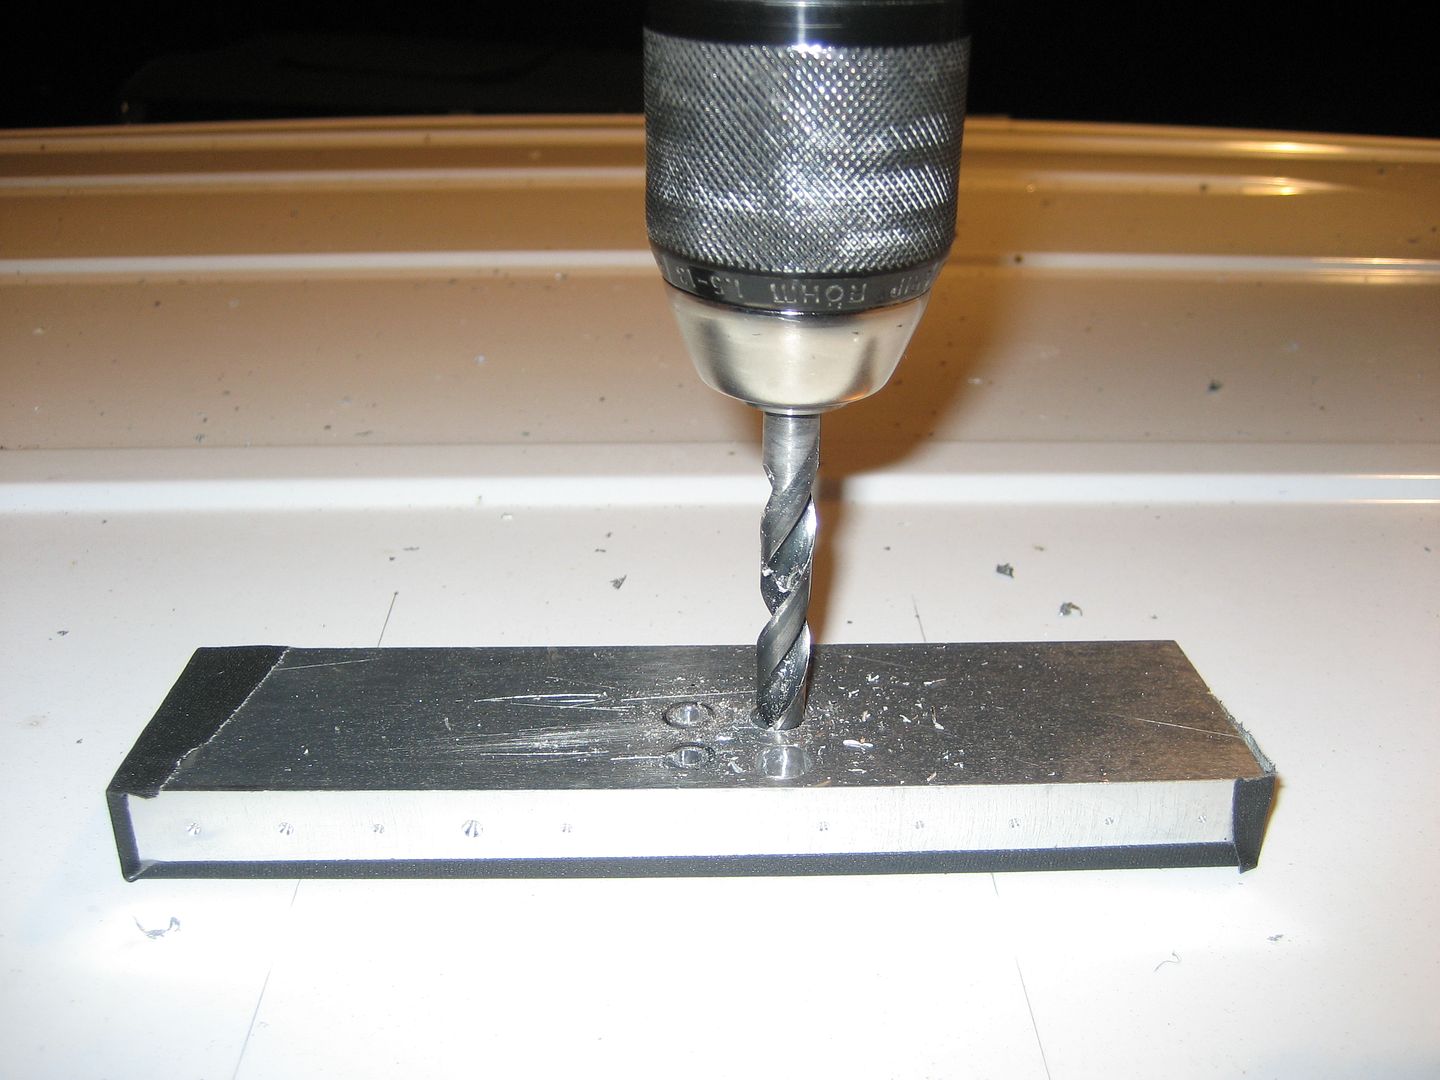
Solved. I always forget that I have a machine shop at my disposal...
-
97CargoCrawler
Topic author - I sleep in my van
- Posts: 754
- Joined: Thu Jan 24, 2008 11:50 pm
- Location: Near Los Angeles, CA
- Contact:
Re: Homebrew Con-Ferr Style Porthole Roof Rack Build
That counterbore did the trick:
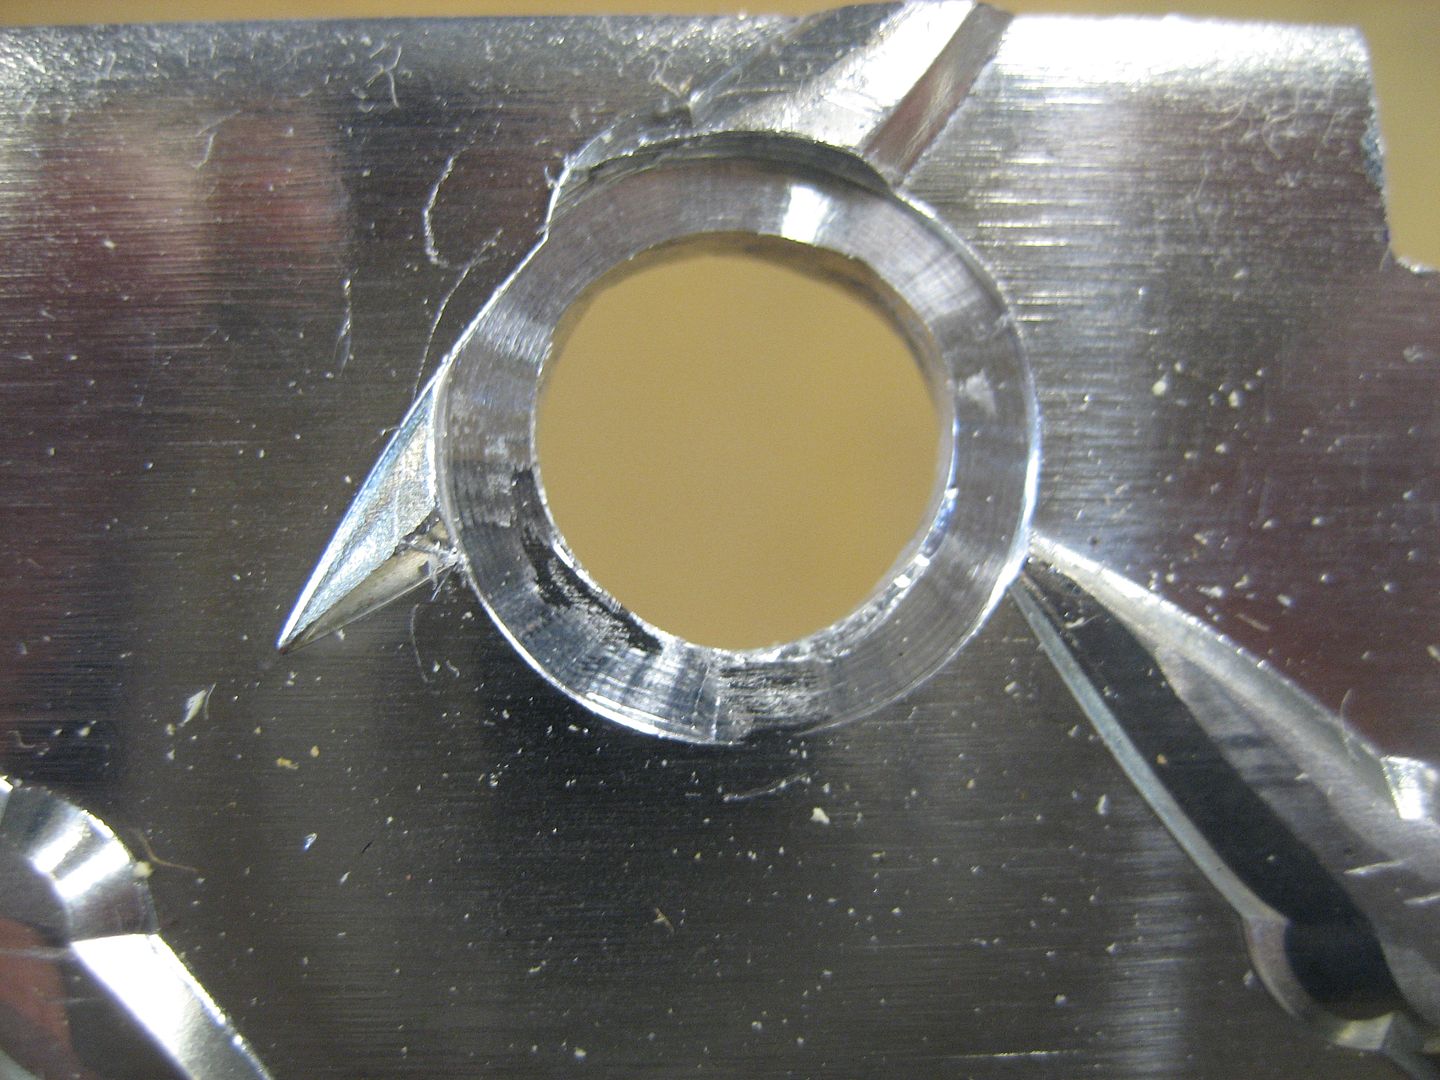
I'm also going to use a 1.25" hole saw to cut holes right above the 8 crosses on the floor of the rack. Since those are the strongest sections of the floor I thought they would make good anchor points for attaching anything I might need to hold down with bolts in the future:
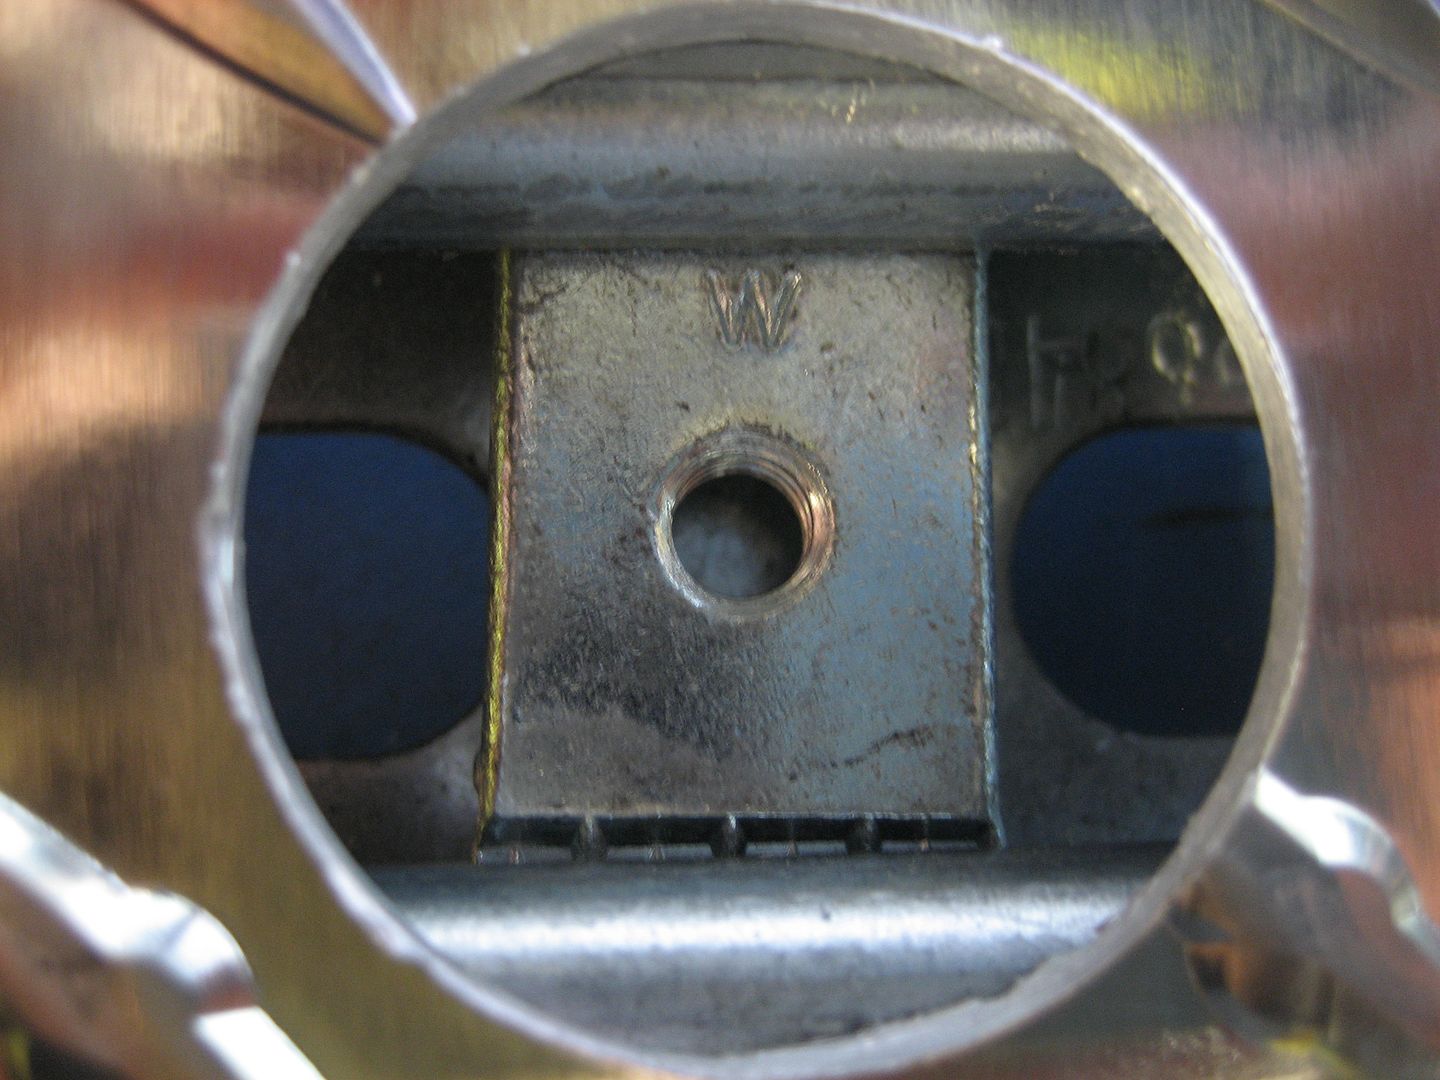
The hole is big enough to insert and twist a strut nut into place. This way I can use any size strut nut or stud nut I please since they can be removed easily. I could also slap a washer on there and attach some eye-bolts. Pretty cool!
So I have been debating for weeks how I'm going to find the cross members from outside the van. One could say it might be easier to drill the holes from inside the van, that way I will for sure hit the cross member. But NOOOOOO. With the two surfaces being separated by 1/2" or so I run the risk of the drill bit landing off center in the second piece of metal.
If this happens, the holes in the roofs sheet metal won't line up with the holes in my foot plates. The holes in the foot plates have to be pre-drilled and exact. There isn't any room for error since the lip on the plates is just wide enough to accommodate the head of the bolt. If it's even slightly off then the head will hit the pyramid part that contains the leg.
So the holes have to be drilled from outside the van. It's gonna be like trying to find a wood stud in a wall, the only problem is that instead of drywall i have wood panels. So I came up with a clever idea. I'm going to drill a very small hole smack in the center of each cross member right at the edge of where my foot plates will go. That in itself it challenging since the sides of the van curve outward and I'm putting a straight rail on top. So I need to compensate for that extra distance away from the sides of the van. Anyway, I will then shine a light through that tiny hole in the cross member. The light will fall in a tiny spot on the roofs sheet metal
with the exact center being the brightest spot. I will then place a very strong neodymium magnet right on the spot of light. On the outside roof of the van I will sprinkle some iron dust. With any luck it will converge on the spot I marked with the magnet! Then I will have a decent idea where the center of the cross member is so I can align my foot plate and drill.
This still doesn't solve the problem of drilling a straight hole through two pieces of separated metal. For that I need to make a jig. The jig will be a flat steel plate with holes that match the feet. I will drill 4 holes in the plate and weld 1" long steel tubes through the center of those holes. Of course those tubes need to be perfectly perpendicular to the flat surface of the plate. Those tubes will slide in through the holes I will drill in the outside of the roof and align my drill bit towards the cross member below it.
It's complicated and time consuming but I'm not about to start drilling into my van and F it up. It need to be perfect the first time. I don't want any extra holes!
I'm also going to use a 1.25" hole saw to cut holes right above the 8 crosses on the floor of the rack. Since those are the strongest sections of the floor I thought they would make good anchor points for attaching anything I might need to hold down with bolts in the future:
The hole is big enough to insert and twist a strut nut into place. This way I can use any size strut nut or stud nut I please since they can be removed easily. I could also slap a washer on there and attach some eye-bolts. Pretty cool!
So I have been debating for weeks how I'm going to find the cross members from outside the van. One could say it might be easier to drill the holes from inside the van, that way I will for sure hit the cross member. But NOOOOOO. With the two surfaces being separated by 1/2" or so I run the risk of the drill bit landing off center in the second piece of metal.
If this happens, the holes in the roofs sheet metal won't line up with the holes in my foot plates. The holes in the foot plates have to be pre-drilled and exact. There isn't any room for error since the lip on the plates is just wide enough to accommodate the head of the bolt. If it's even slightly off then the head will hit the pyramid part that contains the leg.
So the holes have to be drilled from outside the van. It's gonna be like trying to find a wood stud in a wall, the only problem is that instead of drywall i have wood panels. So I came up with a clever idea. I'm going to drill a very small hole smack in the center of each cross member right at the edge of where my foot plates will go. That in itself it challenging since the sides of the van curve outward and I'm putting a straight rail on top. So I need to compensate for that extra distance away from the sides of the van. Anyway, I will then shine a light through that tiny hole in the cross member. The light will fall in a tiny spot on the roofs sheet metal
with the exact center being the brightest spot. I will then place a very strong neodymium magnet right on the spot of light. On the outside roof of the van I will sprinkle some iron dust. With any luck it will converge on the spot I marked with the magnet! Then I will have a decent idea where the center of the cross member is so I can align my foot plate and drill.
This still doesn't solve the problem of drilling a straight hole through two pieces of separated metal. For that I need to make a jig. The jig will be a flat steel plate with holes that match the feet. I will drill 4 holes in the plate and weld 1" long steel tubes through the center of those holes. Of course those tubes need to be perfectly perpendicular to the flat surface of the plate. Those tubes will slide in through the holes I will drill in the outside of the roof and align my drill bit towards the cross member below it.
It's complicated and time consuming but I'm not about to start drilling into my van and F it up. It need to be perfect the first time. I don't want any extra holes!
1997 SAFARI 2WD CARGO
"I do not think there is any thrill that can go through the human heart like that felt by the inventor as he sees some creation of the brain unfolding to success... Such emotions make a man forget food, sleep, friends, love, everything." Nikola Tesla
"I do not think there is any thrill that can go through the human heart like that felt by the inventor as he sees some creation of the brain unfolding to success... Such emotions make a man forget food, sleep, friends, love, everything." Nikola Tesla
-
97CargoCrawler
Topic author - I sleep in my van
- Posts: 754
- Joined: Thu Jan 24, 2008 11:50 pm
- Location: Near Los Angeles, CA
- Contact:
Re: Homebrew Con-Ferr Style Porthole Roof Rack Build
I spent all day on a ladder drilling holes in my van! I'm almost back in my comfort zone, bolt on accessories galore soon to come.
Where I work there is a special jig for everything, precision and accuracy are essential. Too often I carry those over into my projects. Sometimes it's a good thing, other times it slows me down. I decided to make my bolt hole template out of Polycarbonate. I use Lexan a lot for rapid prototyping. I quickly drew out my pattern and burned some tiny holes through it with a soldering iron. Viola, I had a jig that took like 10 minutes to make as opposed to welding and drilling precision holes in steel. That template served to mark 2 different hole patterns in 10 feet. I then drilled them out to perfection.
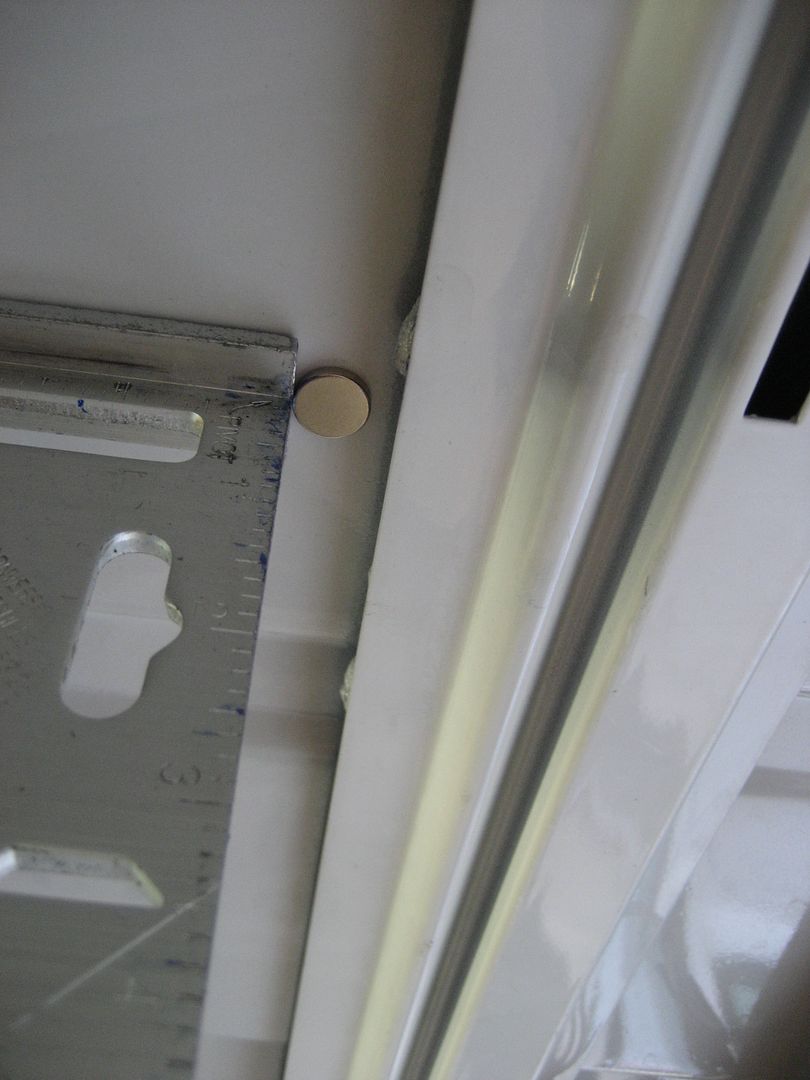
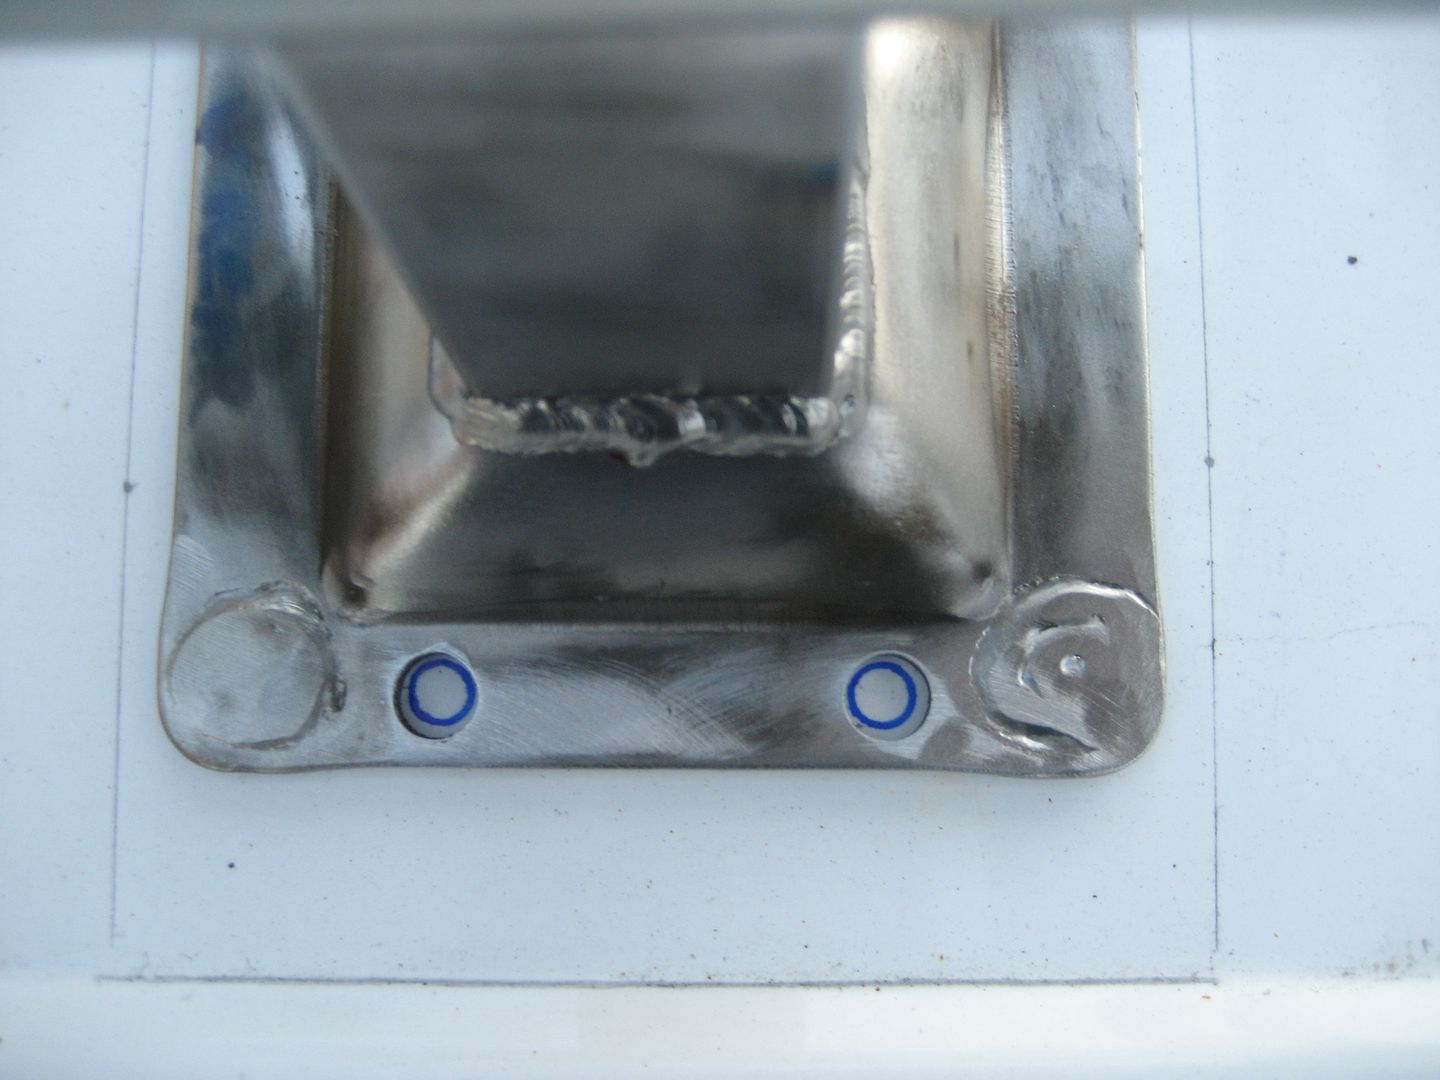
The magnet trick worked like a charm for finding the cross members through the roofs sheet metal. I slapped each magnet on from the inside and used a square to push the magnet under the cross member so the very edge of it would align with the edge of the cross member:
Then I walked over to my grinder and scooped up a cap-full of steel shavings:
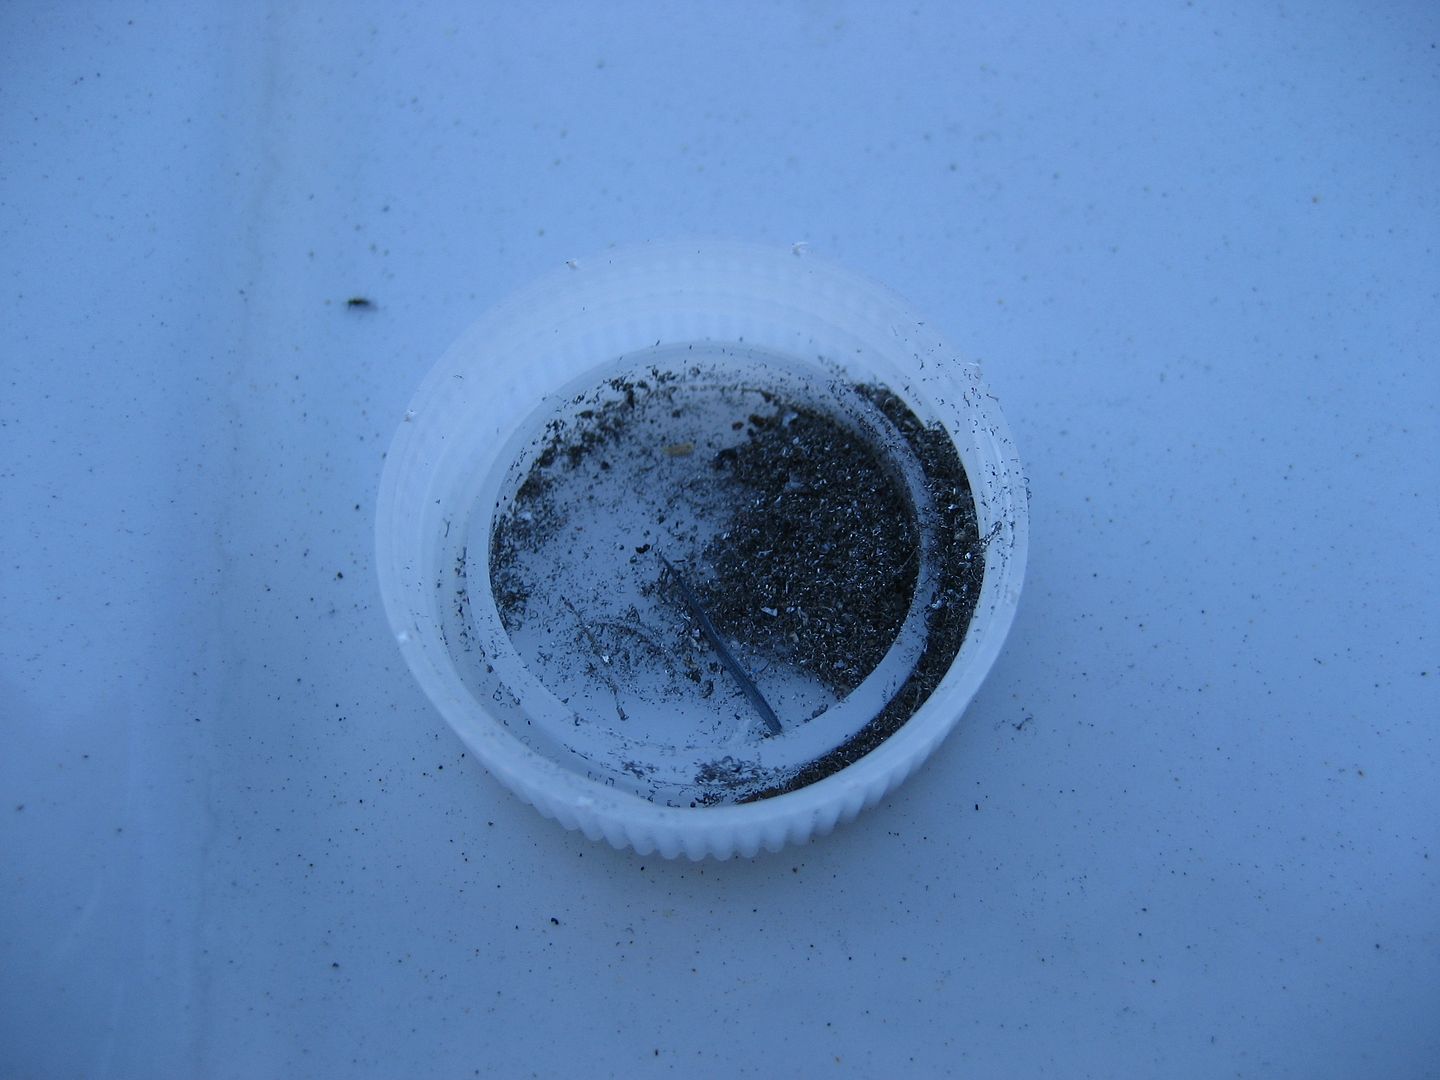
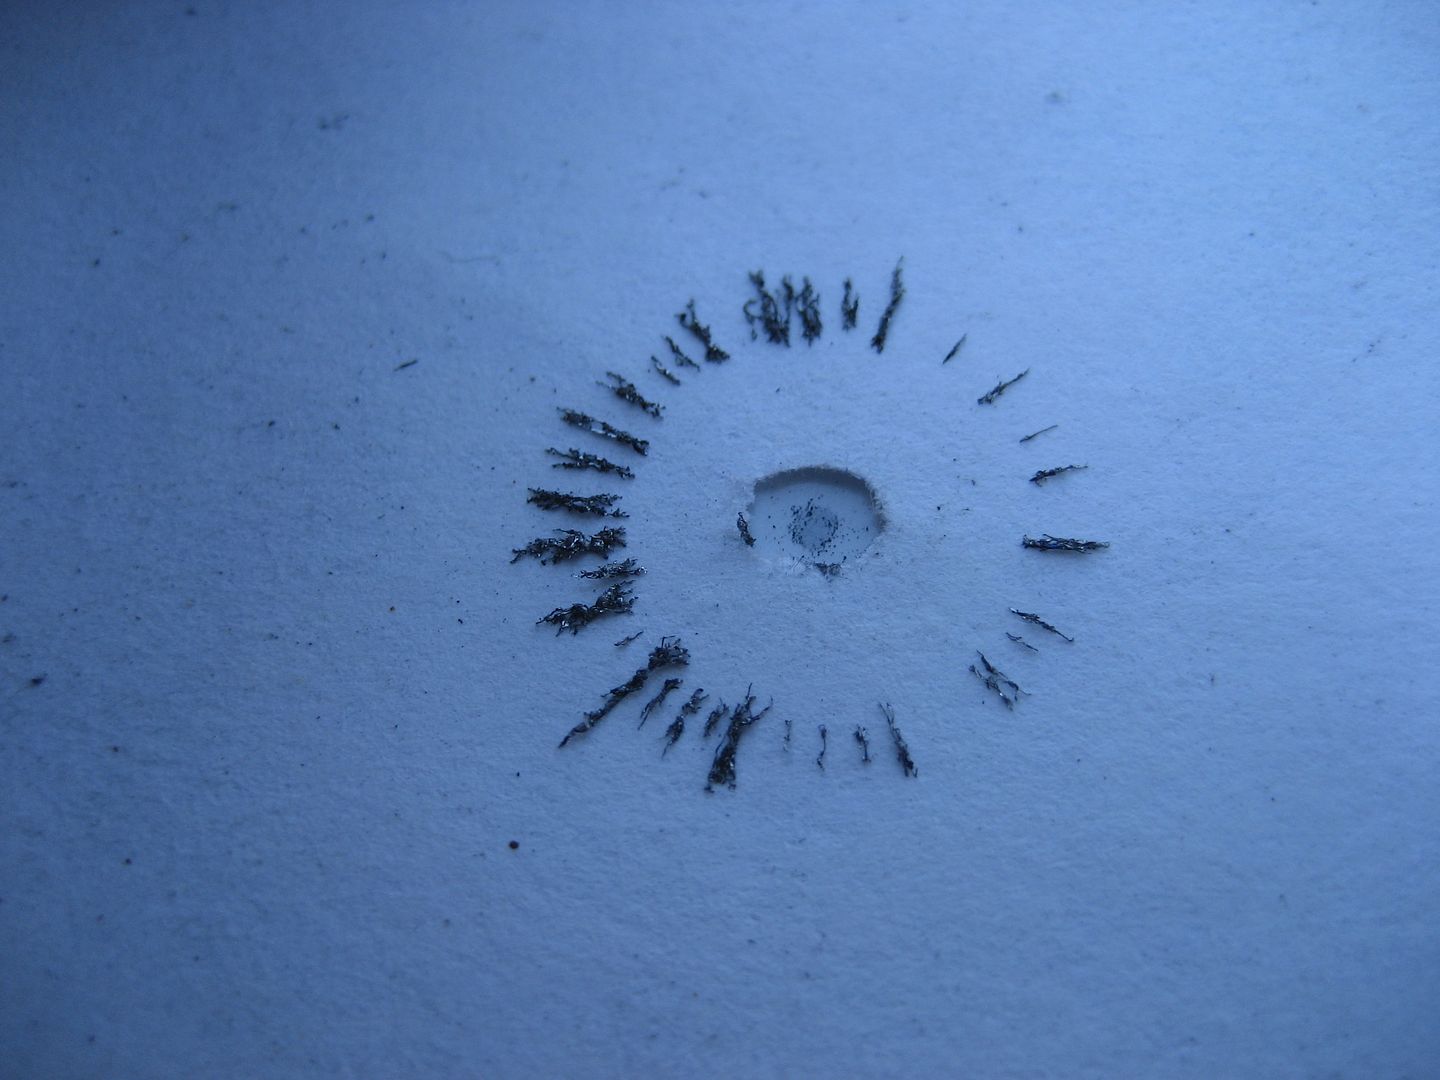
I sprinkled a few of those shavings onto a piece of paper that had a small hole in it:
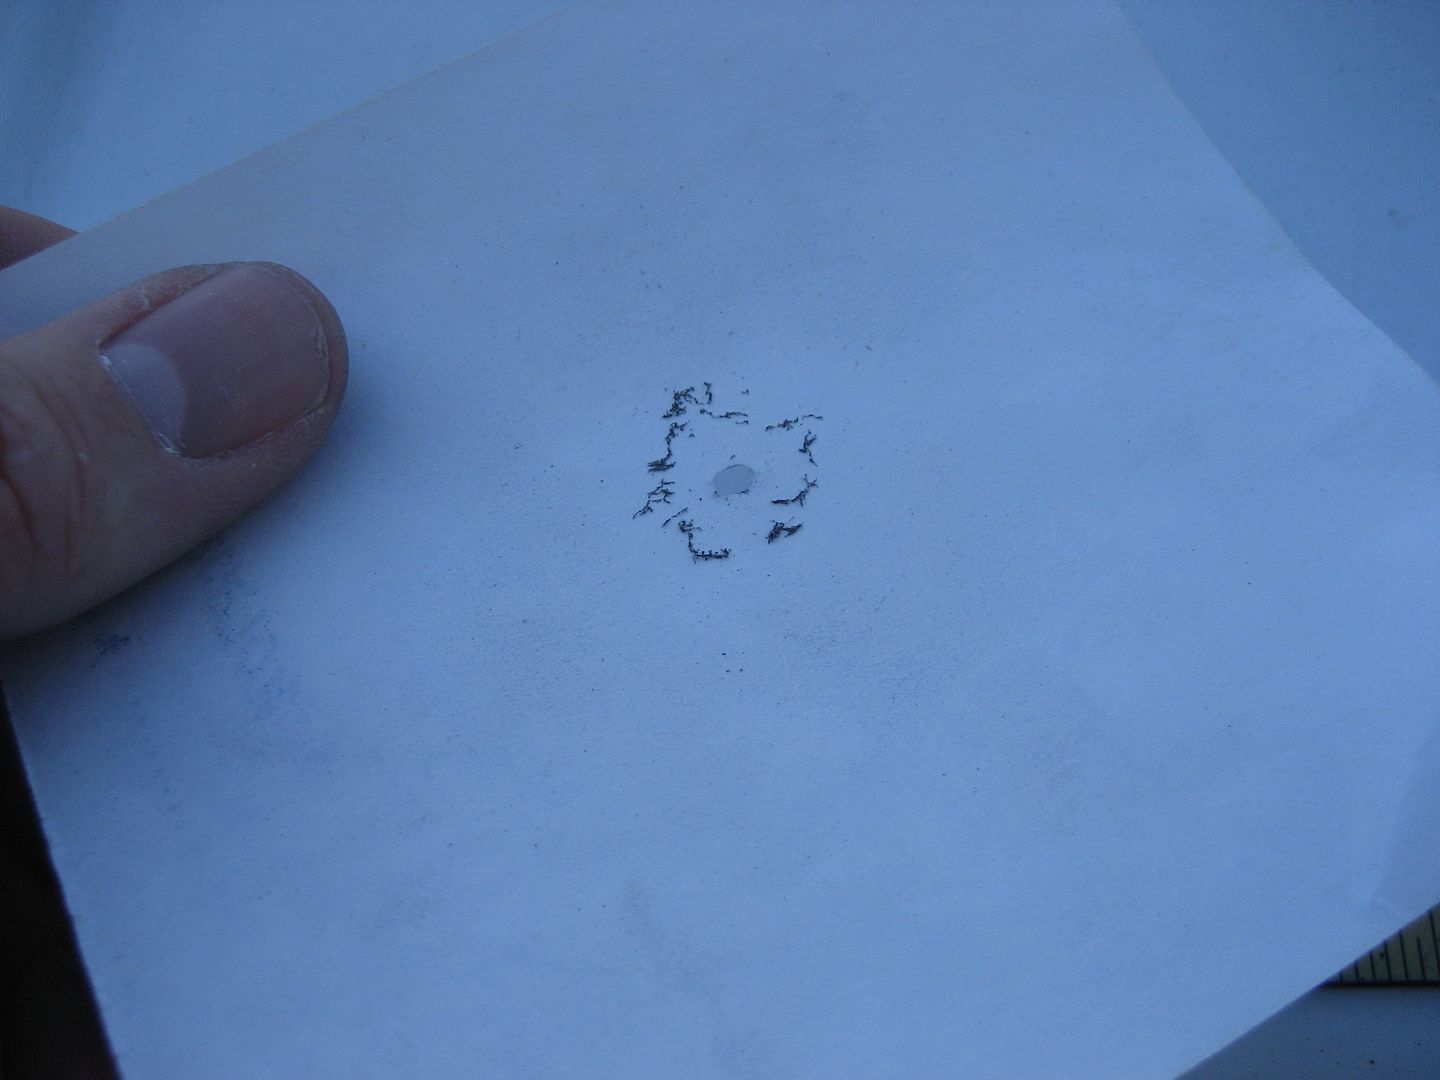
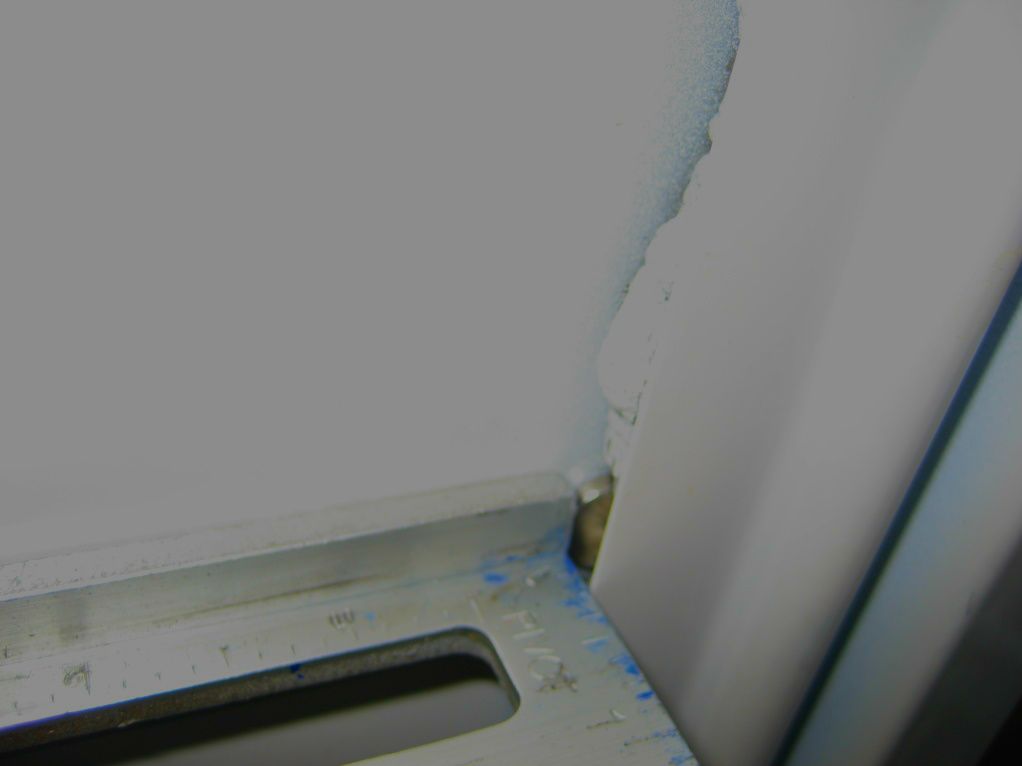
A few taps on the roof with my finger and the shavings perfectly outlined the perimeter of the magnet:
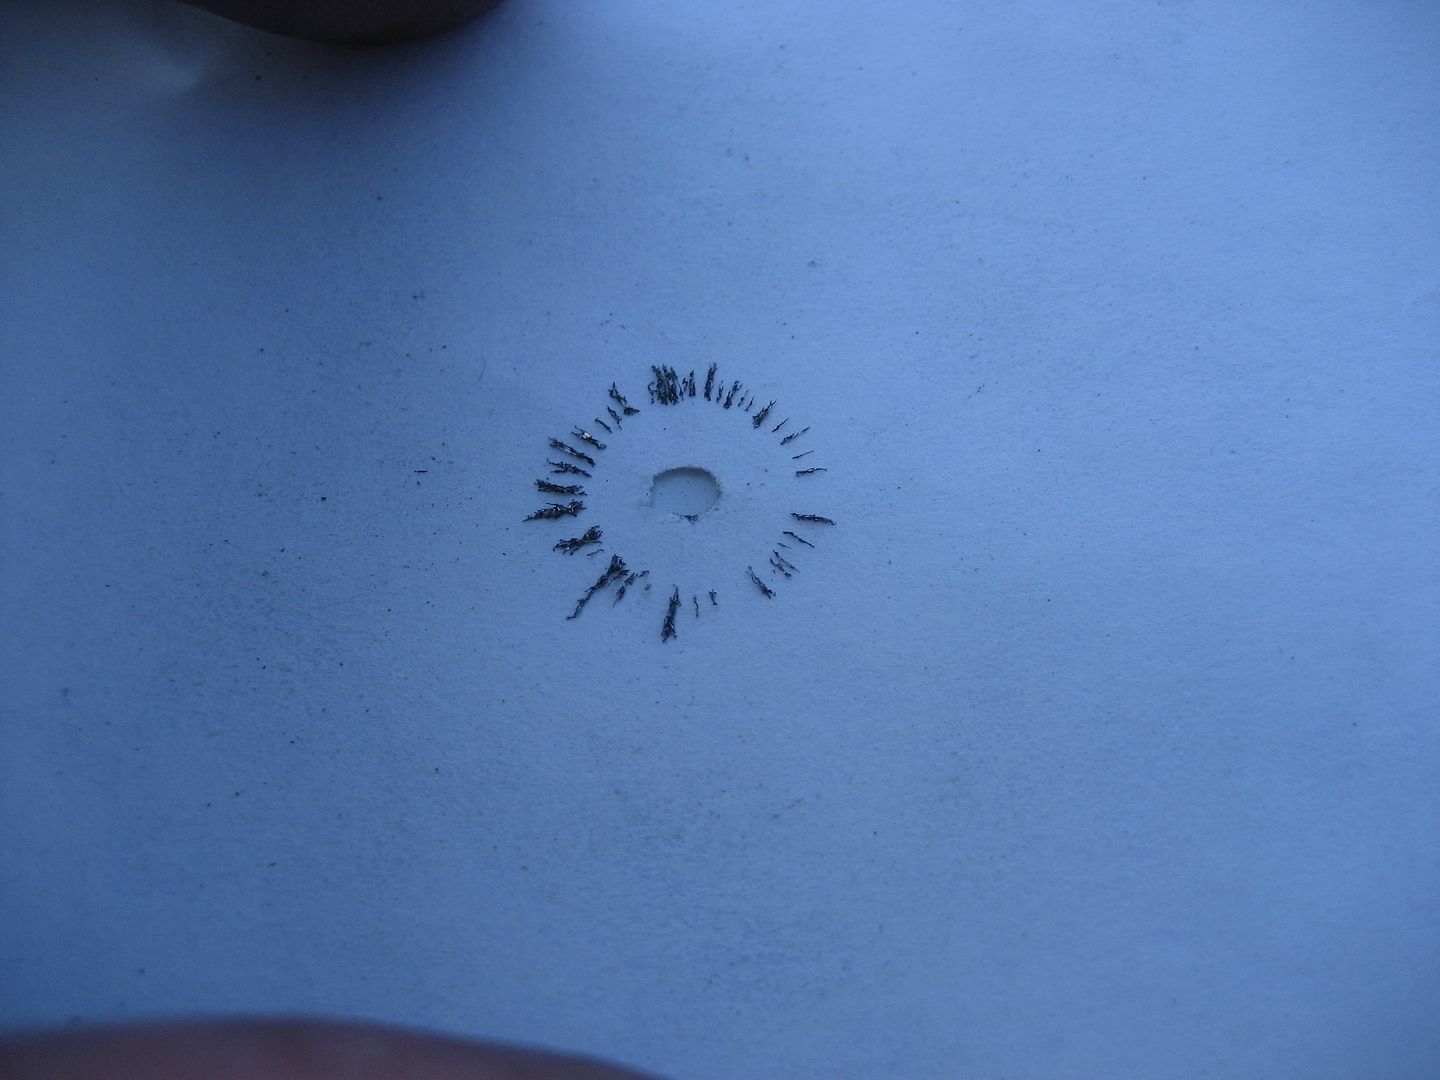
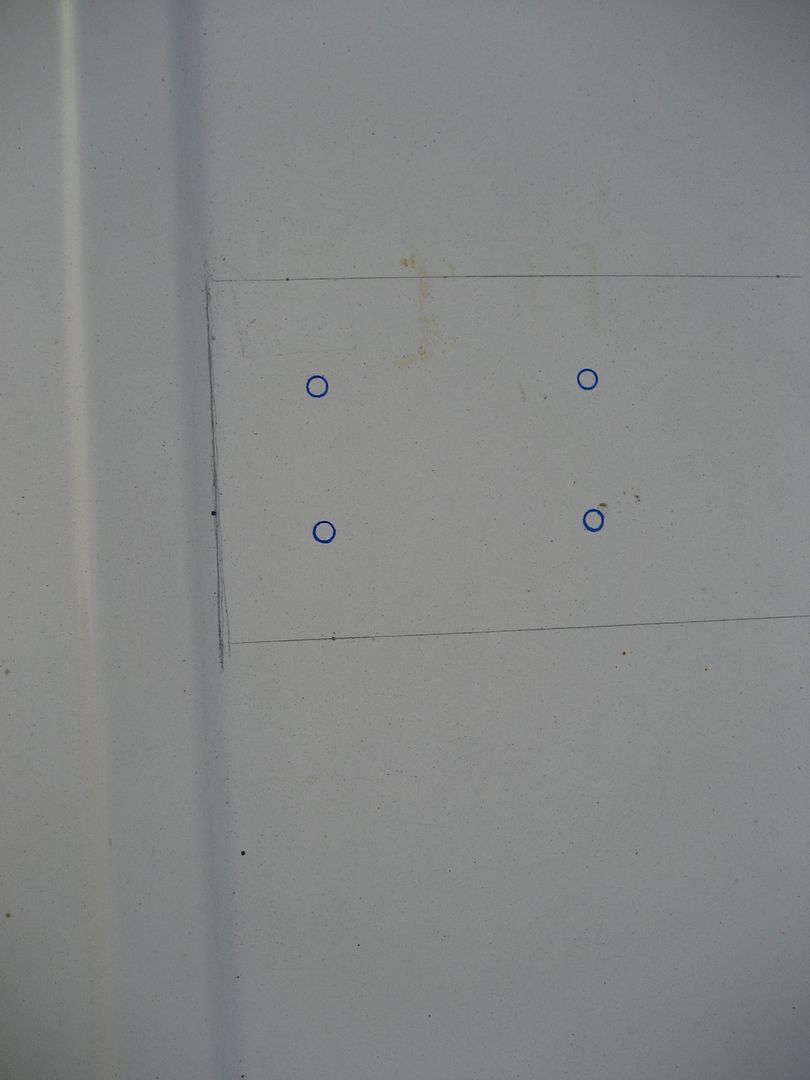
With the shavings centered around the hole in the paper I marked a spot on the roof with a pencil:
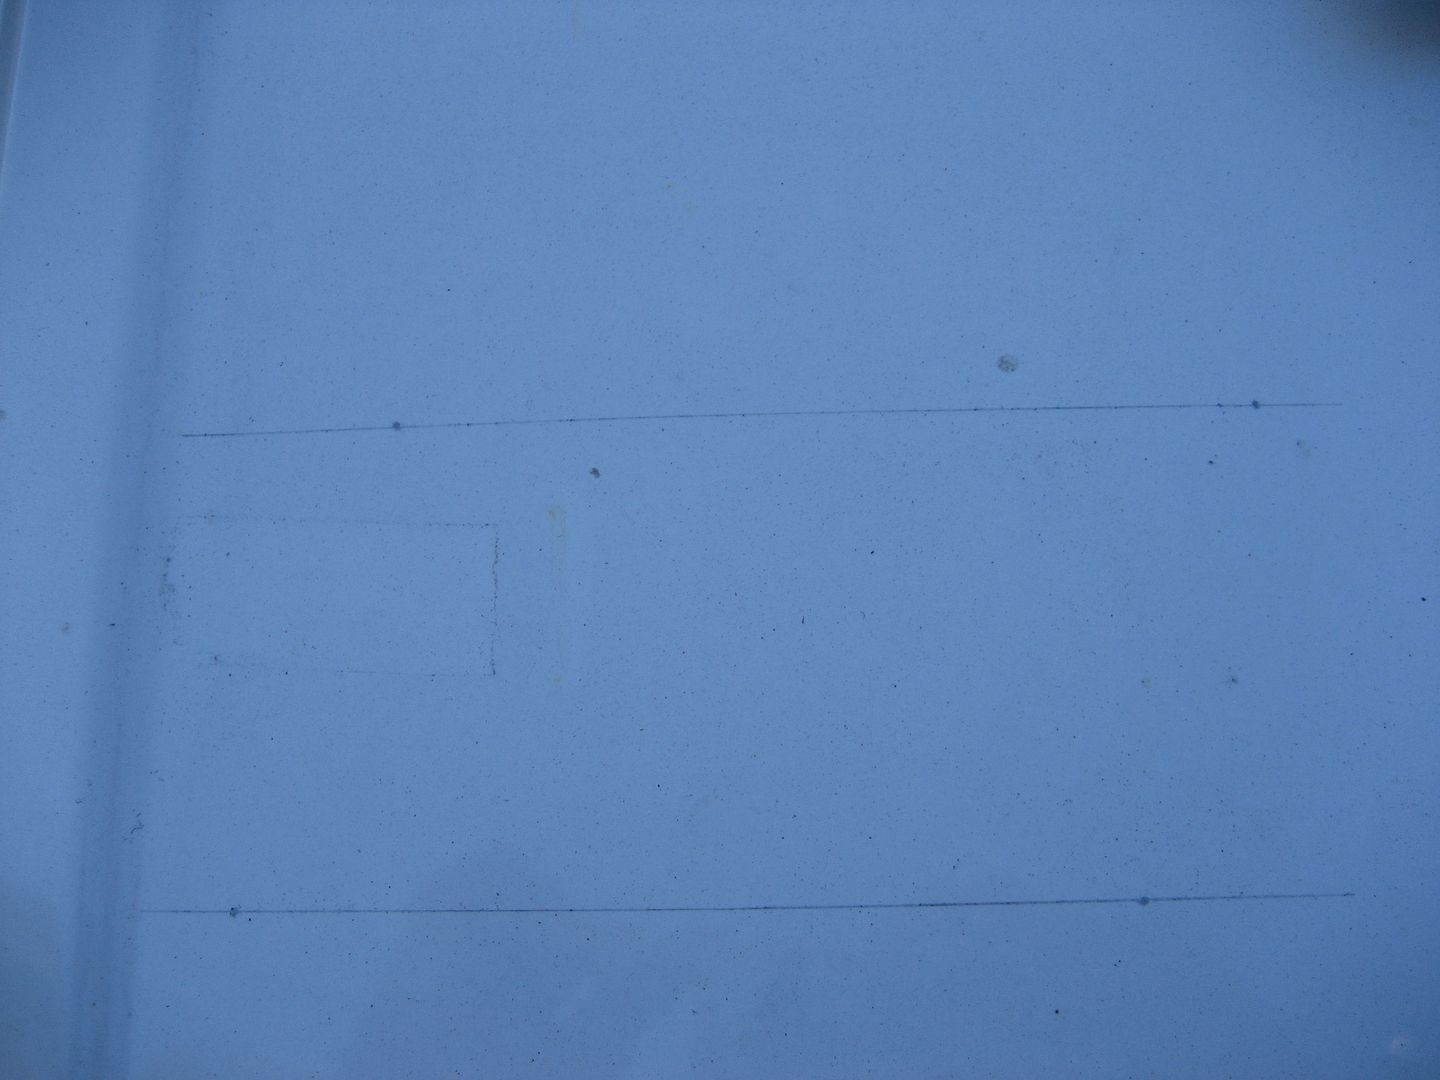
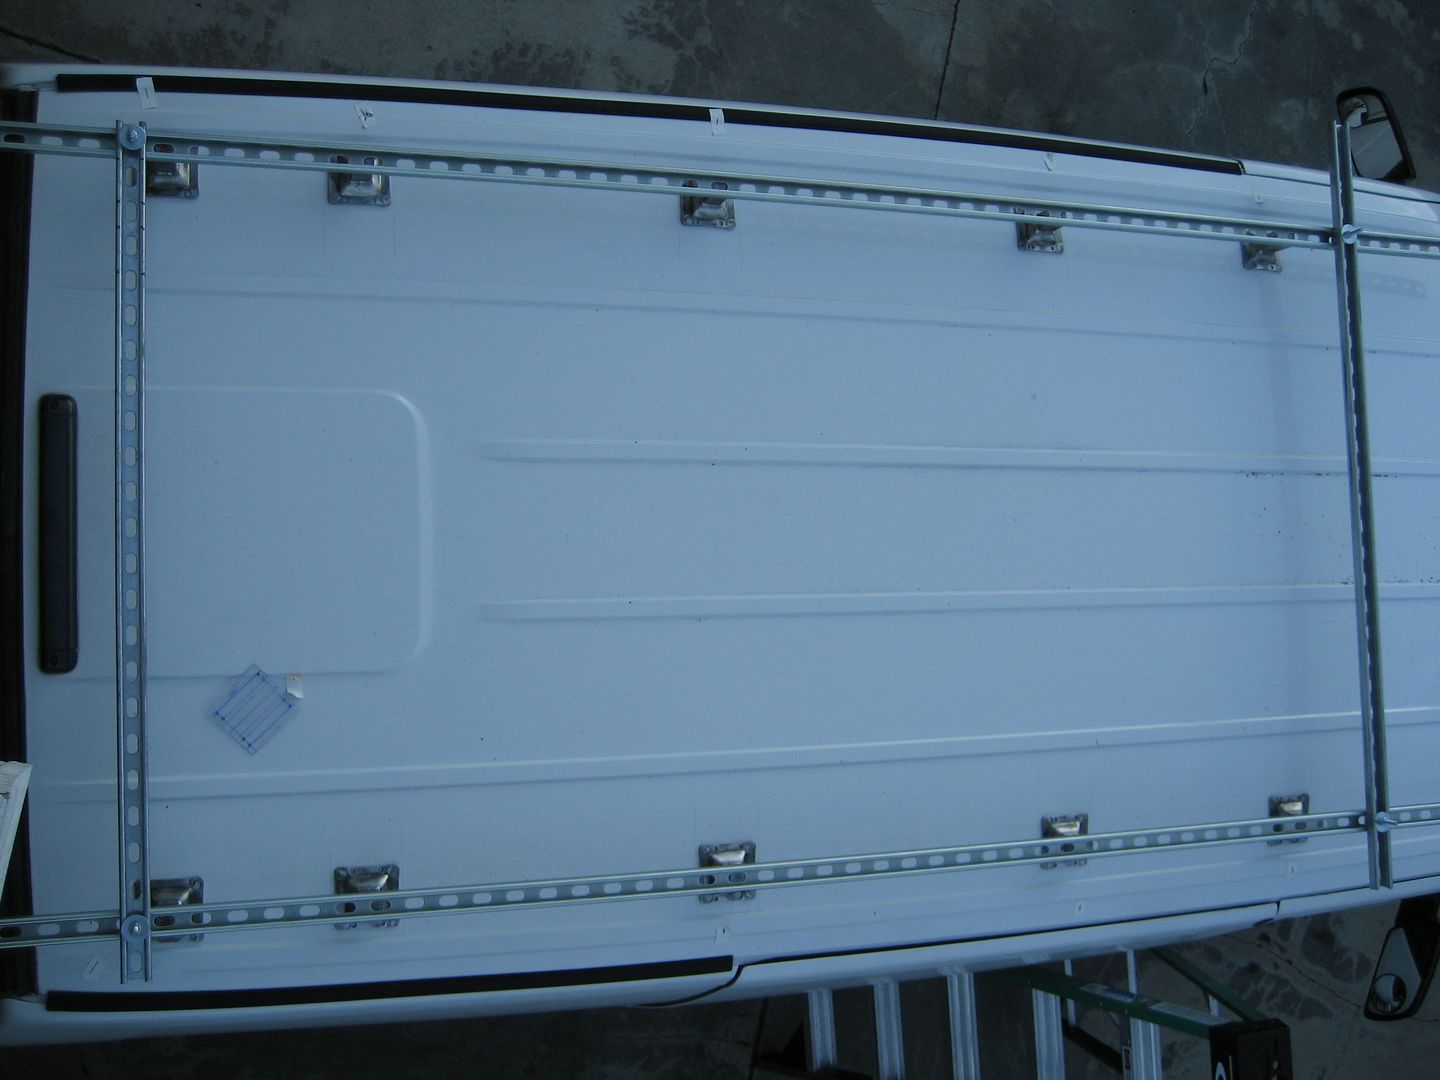
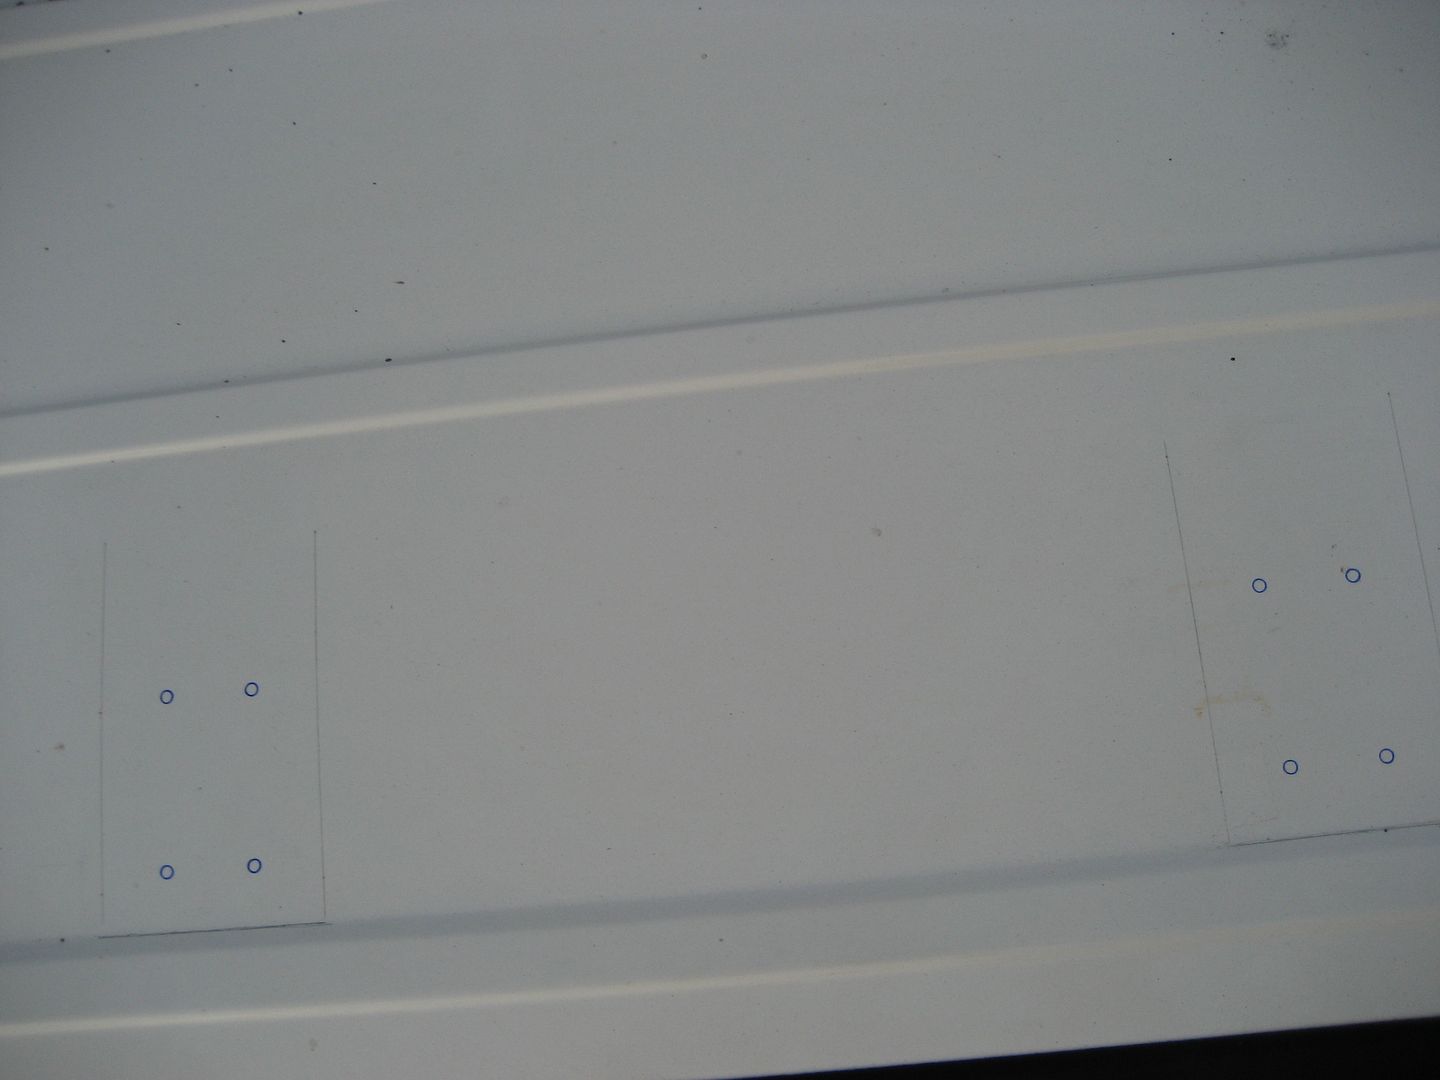
I repeated this process 4 times for each foot location and then connected the dots with lines. I wasn't too concerned where the lines fell above the cross member because I knew that each line would be equal distance from the edge. My entire foot plate would fit inside those lines and they would serve only as guides.
In order to get the proper spacing between the rails I bolted two pieces of strut to the top:
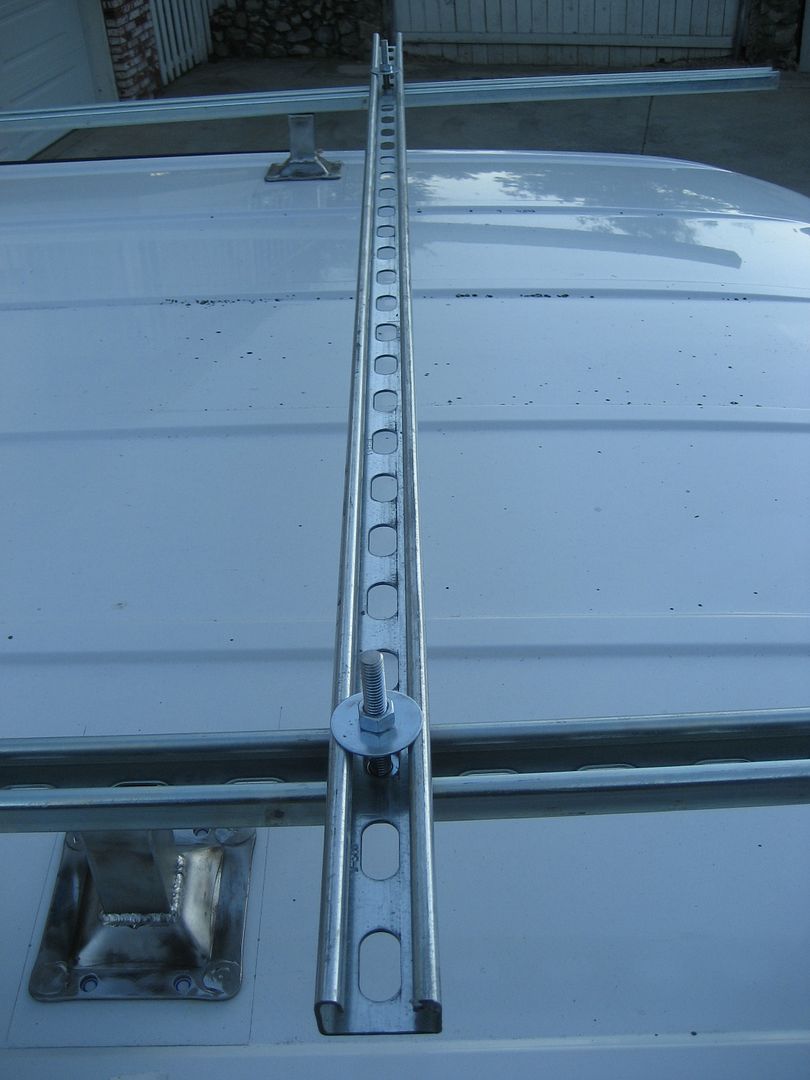
I drew lines down the center of the legs so I could line them up with the center of the rail:
Once everything was lined up I drew the holes:
I drilled small pilot holes first through the top sheet metal then through the cross member using a 3/4" thick aluminum block as a guide to keep the bit straight:
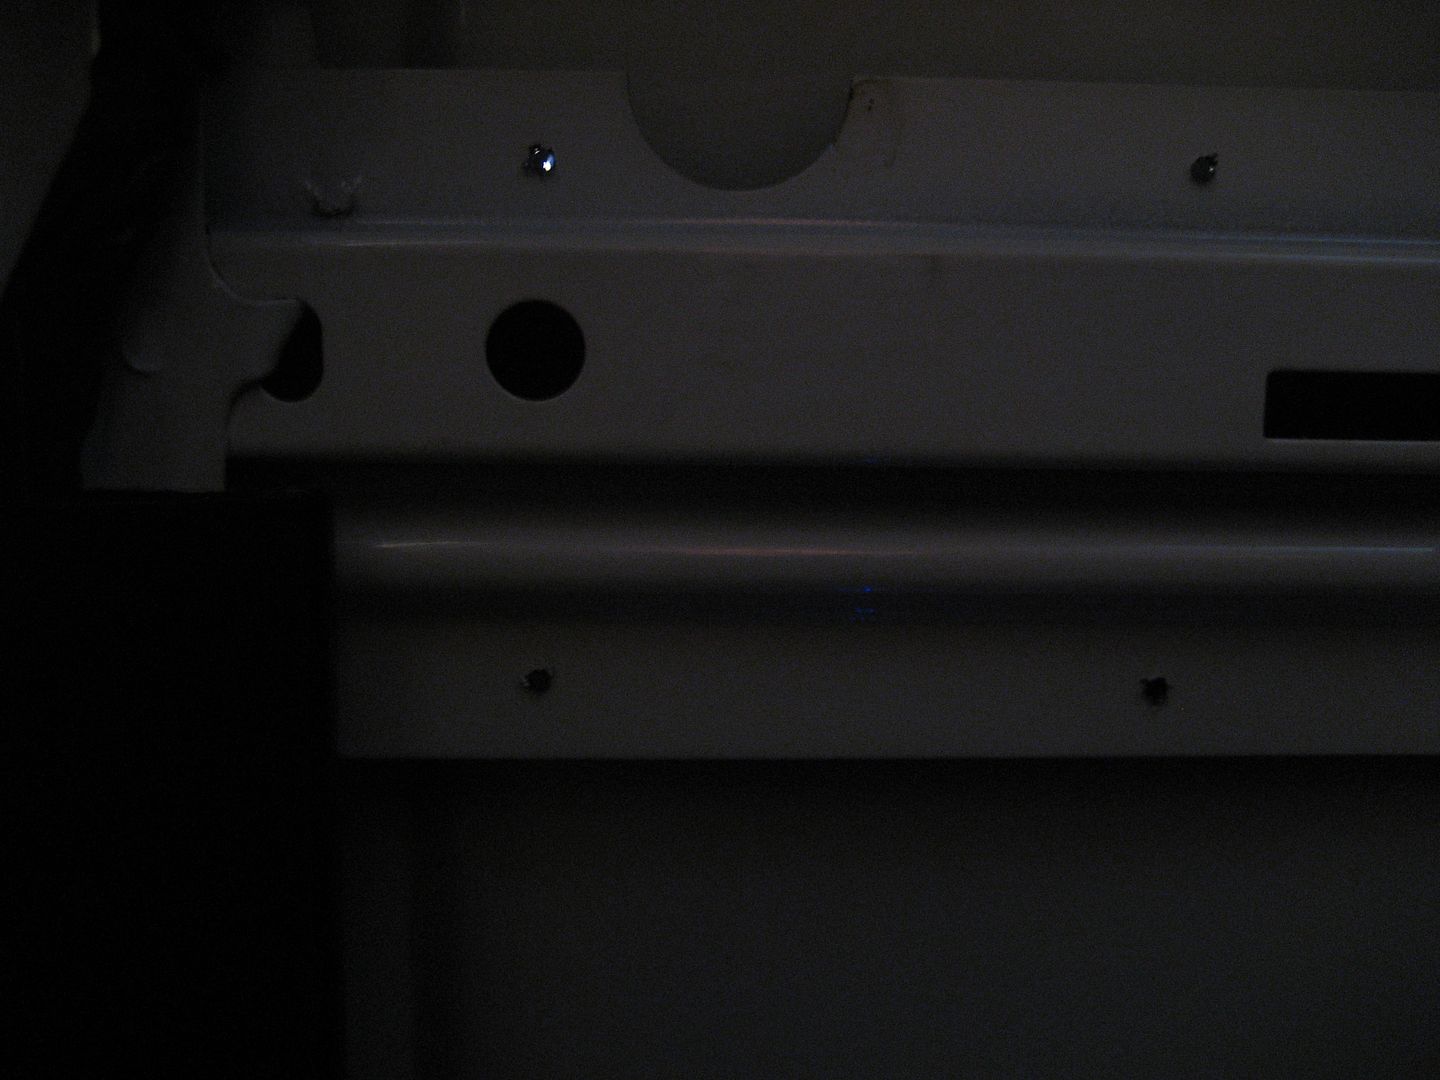
Once I confirmed the holes were just where they needed to be I drilled them out larger using the same block as a guide:
Perfectly centered holes:
I only drilled 20 of the 40 holes today. One side is drilled, tomorrow I will drill the other side and hopefully weld the rails to the feet. I'm going to bolt the feet to the roof then tack weld the rails on top. The nylon spacers are going to take a while to fit so I'll probably be doing that during the week. I still need to figure out the attachment points for my tent rails too. Early next week my roof hatch should arrive. Hopefully I like it. If it works out then I will mount the rack and figure out where it's gonna go. So there's a possibility I will be cutting a big ass hole in the roof next weekend! Yeeeeeha! I'm really looking forward to having a vent and a rack!
Where I work there is a special jig for everything, precision and accuracy are essential. Too often I carry those over into my projects. Sometimes it's a good thing, other times it slows me down. I decided to make my bolt hole template out of Polycarbonate. I use Lexan a lot for rapid prototyping. I quickly drew out my pattern and burned some tiny holes through it with a soldering iron. Viola, I had a jig that took like 10 minutes to make as opposed to welding and drilling precision holes in steel. That template served to mark 2 different hole patterns in 10 feet. I then drilled them out to perfection.
The magnet trick worked like a charm for finding the cross members through the roofs sheet metal. I slapped each magnet on from the inside and used a square to push the magnet under the cross member so the very edge of it would align with the edge of the cross member:
Then I walked over to my grinder and scooped up a cap-full of steel shavings:
I sprinkled a few of those shavings onto a piece of paper that had a small hole in it:
A few taps on the roof with my finger and the shavings perfectly outlined the perimeter of the magnet:
With the shavings centered around the hole in the paper I marked a spot on the roof with a pencil:
I repeated this process 4 times for each foot location and then connected the dots with lines. I wasn't too concerned where the lines fell above the cross member because I knew that each line would be equal distance from the edge. My entire foot plate would fit inside those lines and they would serve only as guides.
In order to get the proper spacing between the rails I bolted two pieces of strut to the top:
I drew lines down the center of the legs so I could line them up with the center of the rail:
Once everything was lined up I drew the holes:
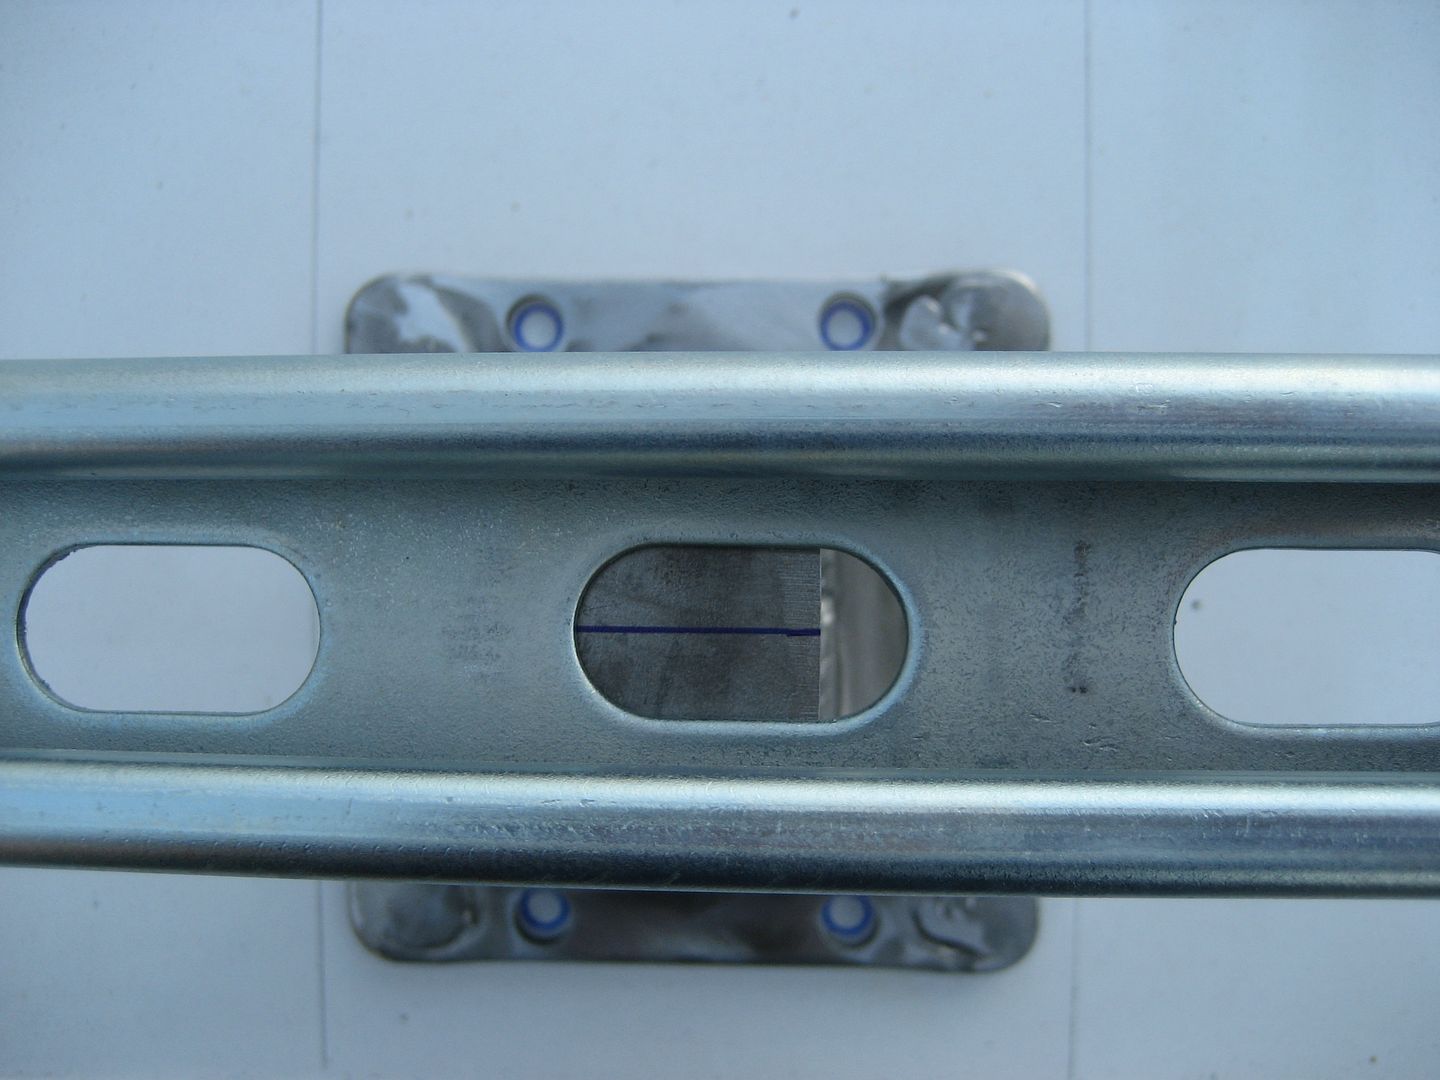
I drilled small pilot holes first through the top sheet metal then through the cross member using a 3/4" thick aluminum block as a guide to keep the bit straight:
Once I confirmed the holes were just where they needed to be I drilled them out larger using the same block as a guide:
Perfectly centered holes:
I only drilled 20 of the 40 holes today. One side is drilled, tomorrow I will drill the other side and hopefully weld the rails to the feet. I'm going to bolt the feet to the roof then tack weld the rails on top. The nylon spacers are going to take a while to fit so I'll probably be doing that during the week. I still need to figure out the attachment points for my tent rails too. Early next week my roof hatch should arrive. Hopefully I like it. If it works out then I will mount the rack and figure out where it's gonna go. So there's a possibility I will be cutting a big ass hole in the roof next weekend! Yeeeeeha! I'm really looking forward to having a vent and a rack!
1997 SAFARI 2WD CARGO
"I do not think there is any thrill that can go through the human heart like that felt by the inventor as he sees some creation of the brain unfolding to success... Such emotions make a man forget food, sleep, friends, love, everything." Nikola Tesla
"I do not think there is any thrill that can go through the human heart like that felt by the inventor as he sees some creation of the brain unfolding to success... Such emotions make a man forget food, sleep, friends, love, everything." Nikola Tesla
-
LiftedAWDAstro
- I have my van tatooed on my cheeks
- Posts: 4379
- Joined: Sat Sep 09, 2006 3:35 pm
- Location: New Haven, NY
Re: Homebrew Con-Ferr Style Porthole Roof Rack Build
Looks good. Awesome attention to detail!
Current rides:
2013 Toyota Tundra DC 4x4
2008 Dodge Nitro 4x4
2005 Nissan Sentra 1.8S Special Edition
Mileage spreadsheet
Vans owned:
1986 Safari 2.5L 4 speed manual - scrapped
1995 Astro 2WD conversion 4.11 posi, shift kit, DHC rock rails - sold to Skippy
1998 Astro 4x4 D44, D60, NP231, full hydraulic system with 9k# Milemarker winch and snow plow - sold to Lockdoc
2003 Astro AWD all stock - traded for a 3/4 ton truck
2005 AWD, 4.10's - sold to skippy
-
 krsowles
- I finally get the smurf thing
- Posts: 158
- Joined: Mon Aug 15, 2011 4:11 am
- Location: Colchester, VT
Re: Homebrew Con-Ferr Style Porthole Roof Rack Build
The rack is incredibly sick! Wondering if a similar rack would work well for my camper idea. I know you suggested it but I had wandered in other directions. Thank God I'm planning not building or I'd be feeling ill right now. Not to play down what you've done but for me it would be easier to build a rack similar to yours that opened to a camper top with sleeping platforms and an acess hatch then it would be to build a fiberglass pop top. The camper floor being strong enough to sleep on is mute with the rack idea. Glad I still have months before I'm ready to start! I'm more glad you are cranking along so I can continue to learn! Awesome!!!
Sometimes, I realize that I'm clueless...Man, I hate those moments!

"S.S. Dark HoMutt"
1999 Chevy Astro AWD
1991 Chevy Astro AWD(retired)
"S.S. Dark HoMutt"
1999 Chevy Astro AWD
1991 Chevy Astro AWD(retired)